To register your business for Apple Business Chat please follow the steps:
- Step 1: Create an Apple ID (if your don’t have one)
- Step 2: Create organisation profile and register your organisation
- Step 3: Register your Apple Messages for Business Account(s) (create account(s) and connect them with MessengerPeople as Messaging Solution Provider)
- Step 4: Schedule and take a brand experience QA test conducted by Apple
- Step 5: Launch
You can find a very detailed guide by Apple hier. Individual steps are shortly explained below.
Step 1: Create an Apple ID
Note: if you have a personal Apple ID, you should create a separate Apple ID for your organization one using your organization’s email address to administer Business Chat. You can create an AppleID here.
Step 2: Create organisation profile and register your organisation
Set up your organisation profile by entering organisation information and address. Navigate to Members/My Organisation to accomplish that. Submit your organisation profile for a reveiw by apple which may take a couple of days. You can track the status of your application. Should you have any questions, contact Apple by clocking on “help” in the right top corner.
Step 3: Set up your Apple Messages for Business Account(s)
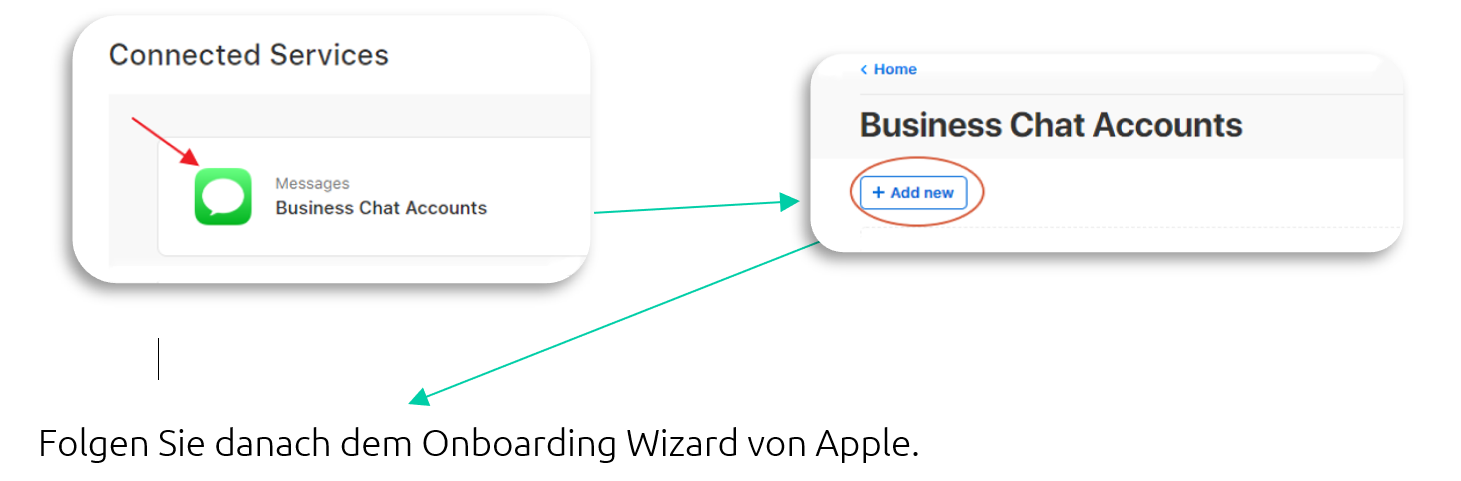
Please follow https://register.apple.com/business-chat to register for Business Chat. It is possible for a company to have multiple messages for business accounts, e.g. one per brand.
- Click “Business Chat Account” and add a new account (Screenshot)
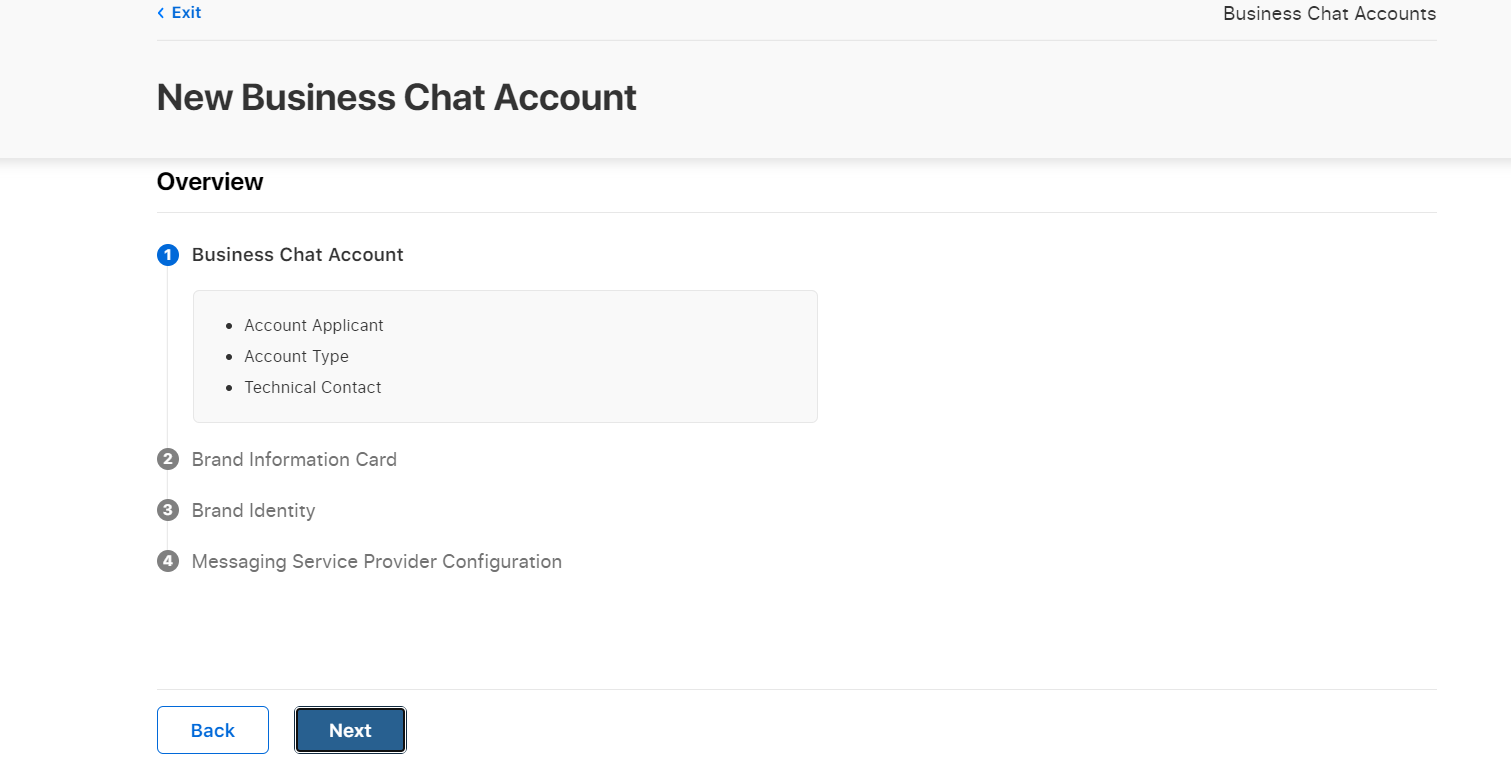
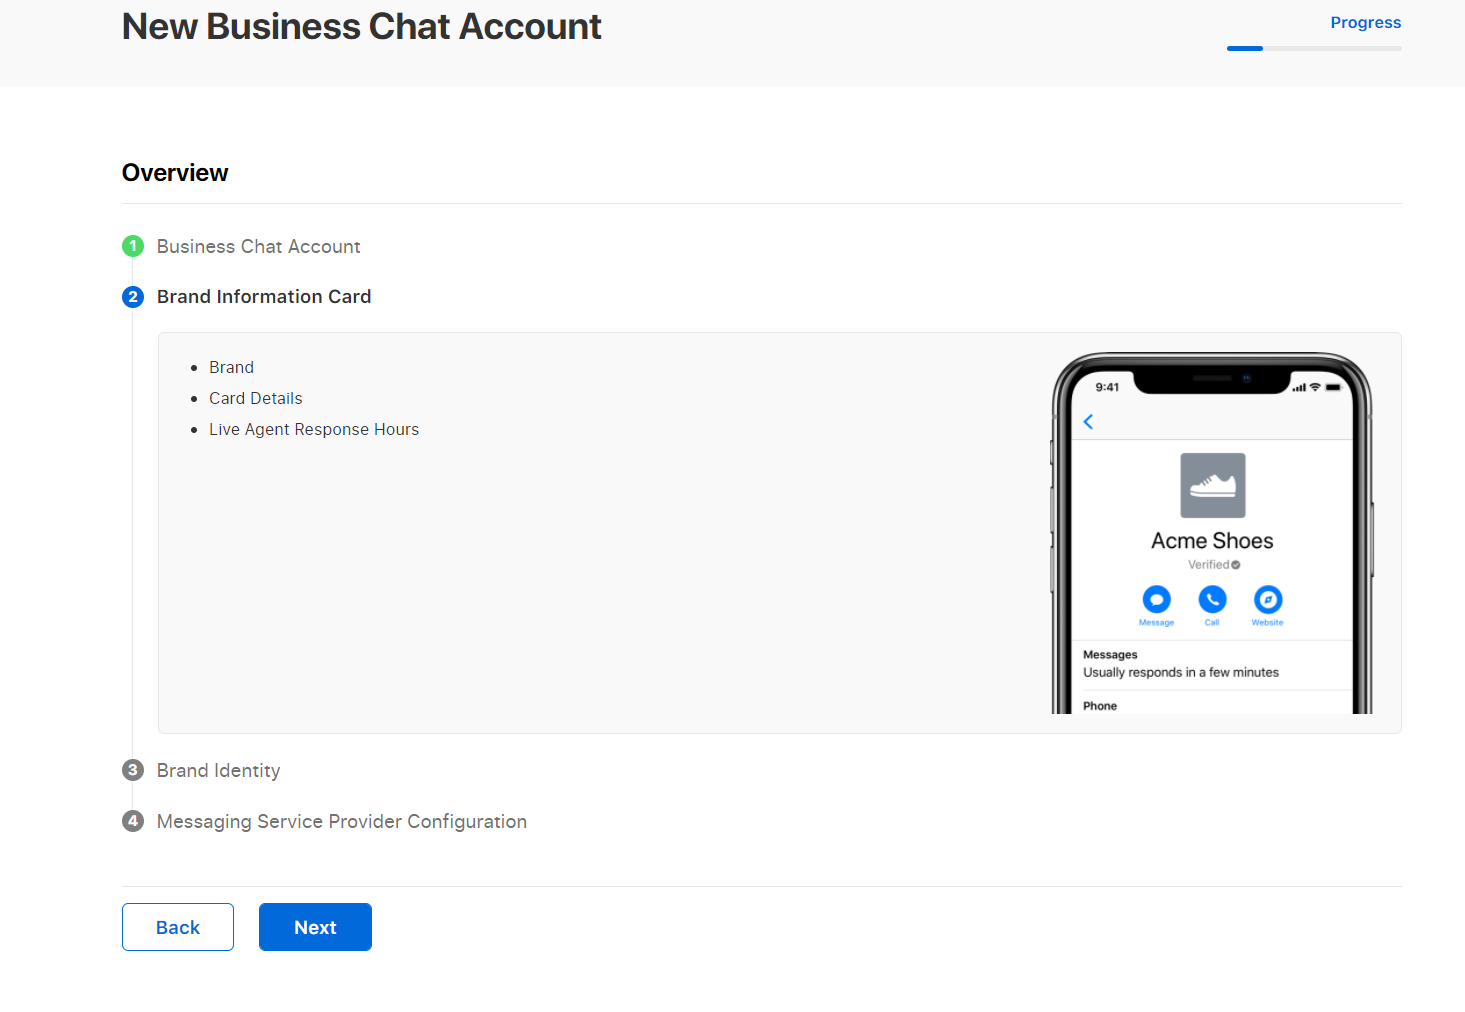
- Follow the onboarding wizard to enter information about your organization, brand information card, configure brand identity (logo design: square, at least 1024x1024px; wide logo or header ). Up-to-date information see Human Interface Guidlines.

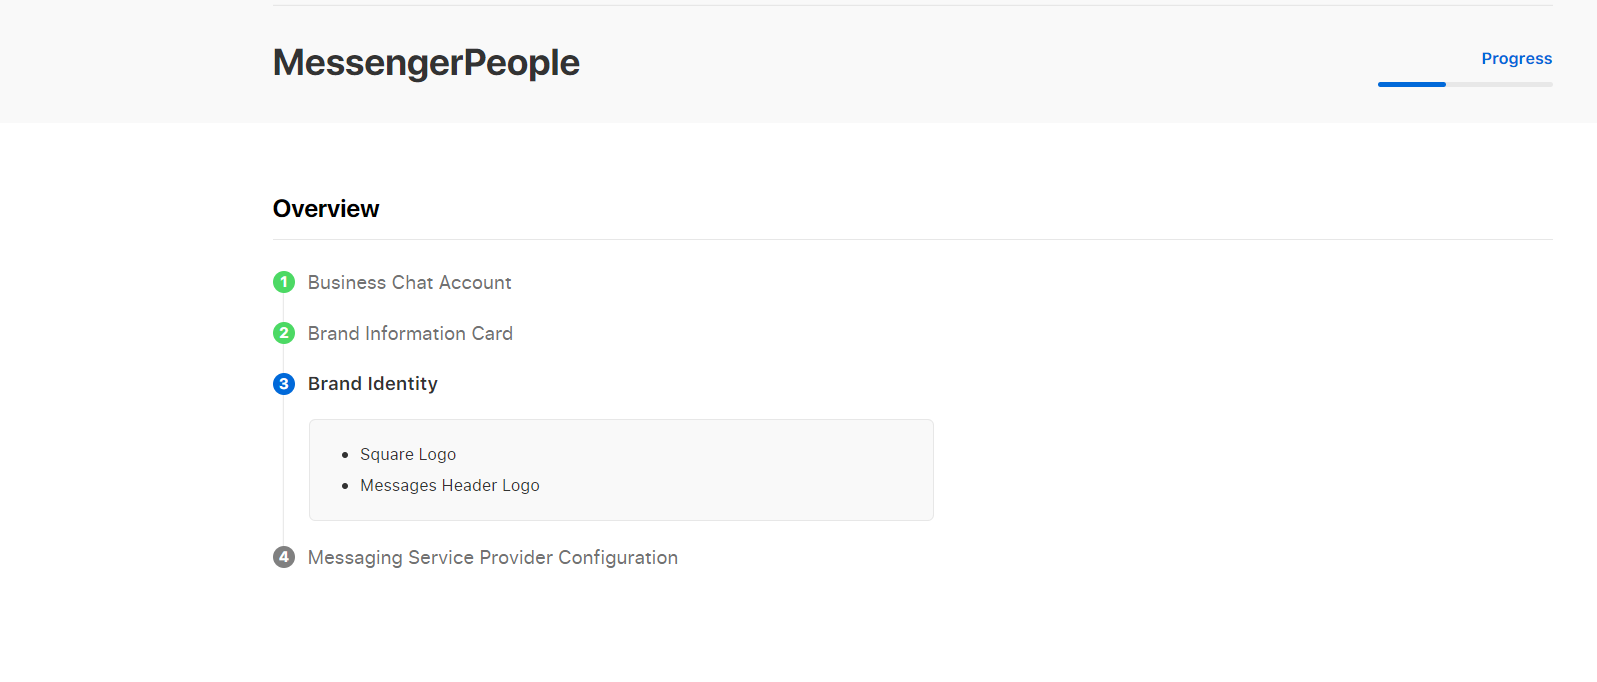
- Choose “MessengerPeople” as your Messaging Service Provider (MSP) when prompted. You will be taken to your MessengerPeople Account where you should choose a channel to connect with Business Chat.
- Click “Next” when done and your profile is analyzed for errors. When you’ve filled out the required information without any errors, click “Submit for Review”. After you submit your profile, the notification area on the profile page shows that your profile is in review.

Apple reviews your application (2-14 days) and an email notification is sent to you with the next steps. To check on your application status, click “Help” located at the top right corner of the page, and fill out the email form.
Step 4: Schedule and take a brand experience QA test
Apple puts a lot of value on great customer experience. That is why Apple would like test the user experience in your Apple Business Chat channel prior to the launch and discuss your use-case. Once your Business Chat account was approved, you will be contacted the apple-business-register team with the information on the next steps, i.e. brand experience QA test. You will receive a document to be filled in with a brief description of your use case. Fill in the document and email it back to Apple, the Apple team will get in touch with you to schedule the test. Please, make sure that there is an agent online during the test to handle the tickets by the test users. Our account managers will assist you should you need any advice on filling in the document.
When conceptualizing and setting up your channel, please mind, that your channel should always provide a possibility to get in touch with customer service agents!
Step 5: Launch
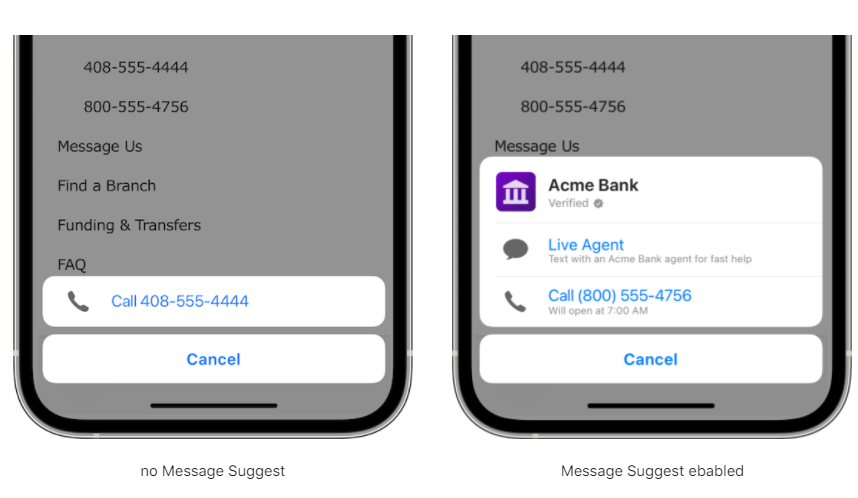
Configure the entry points, such as widget and Business Chat buttons on the webpage/emails/apps. As you get a better understanding of user journeys, you can also enable message suggest – special entry points for iOS and MacOS users (e.g. via the search, maps).