To avoid misunderstandings in communication between a bot and a user, it is necessary to clearly guide a user throughout the dialogue: at any point of time it should be clear to a user what kind of input is expected from him. One way to guide a user is by offering him a menu with options to choose from.
Here is how you can create a menu in the chatbot builder:
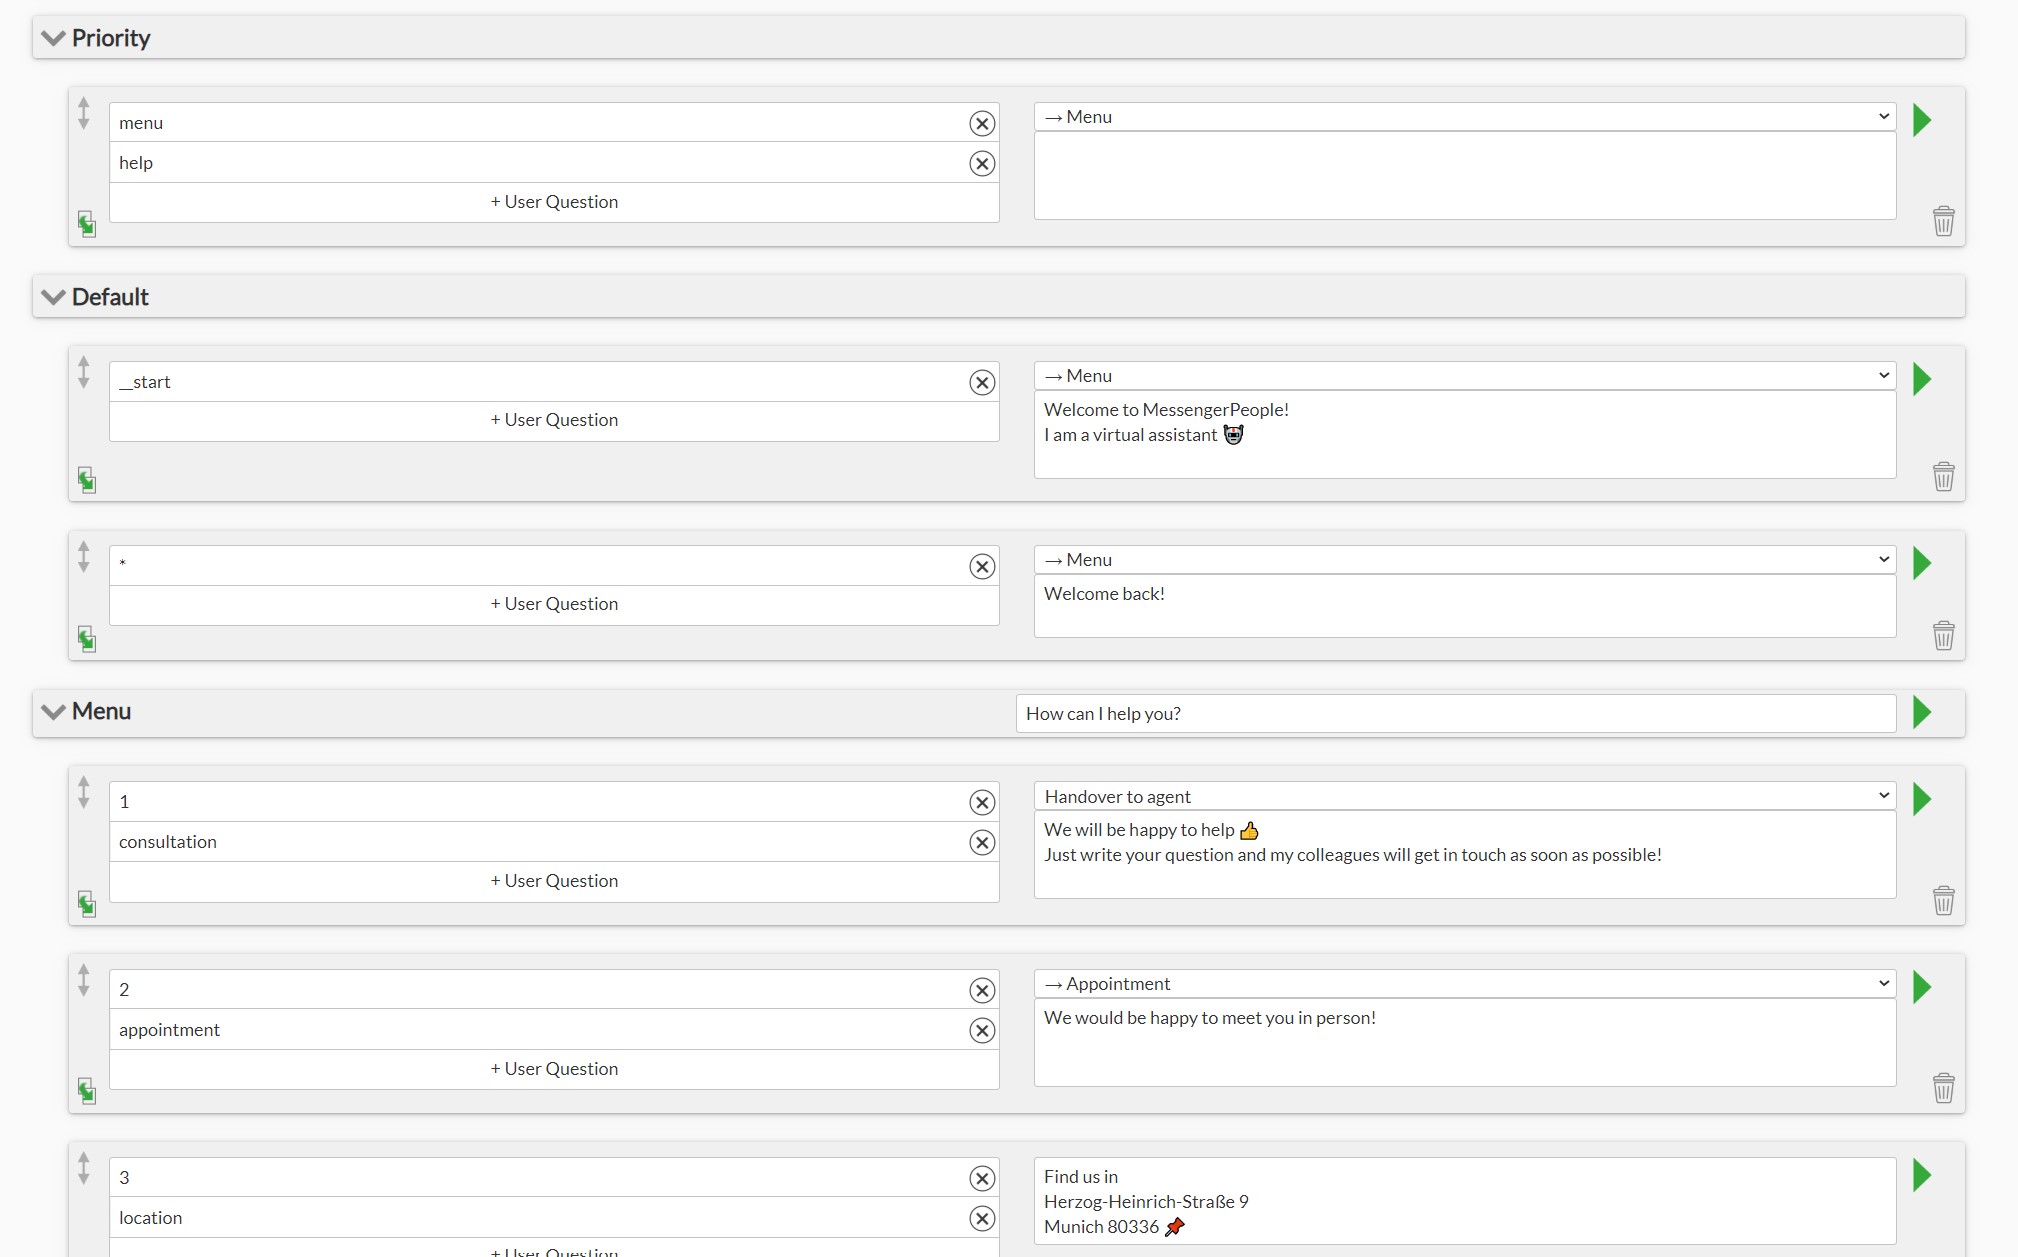
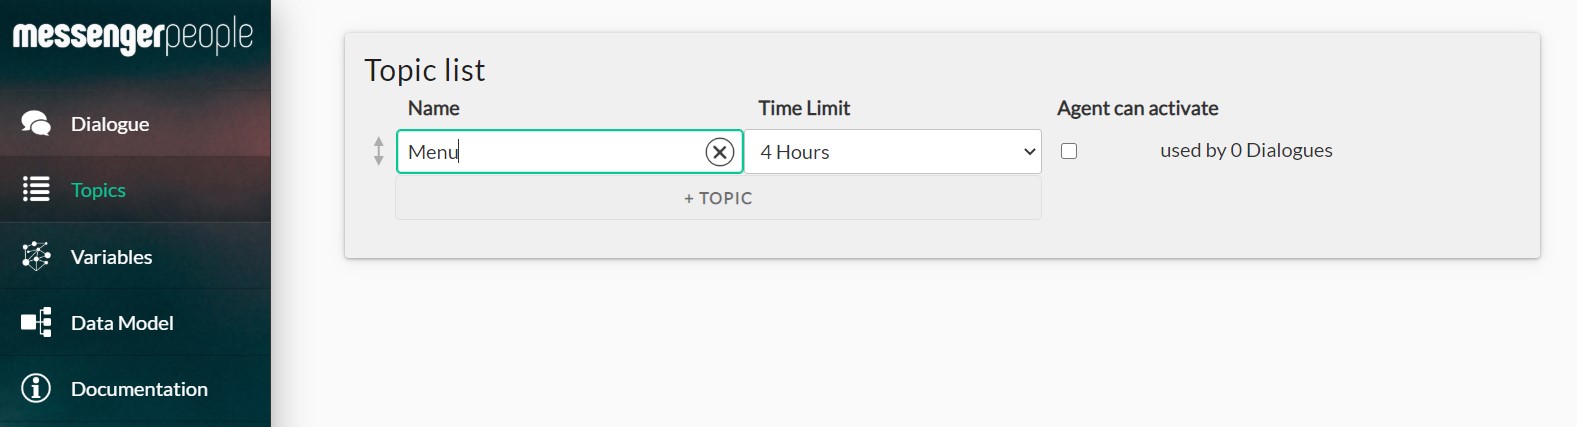
1) Go to the tab “Topics” and create a new topic, for instance, “Menu”. You can define a topic timeout of 1 or 4 hours: that will terminate the topic automatically after a certain time if a user was not responding. Next time a user writes something, the dialogue will start from the very beginning, i.e. from the topic “default”.
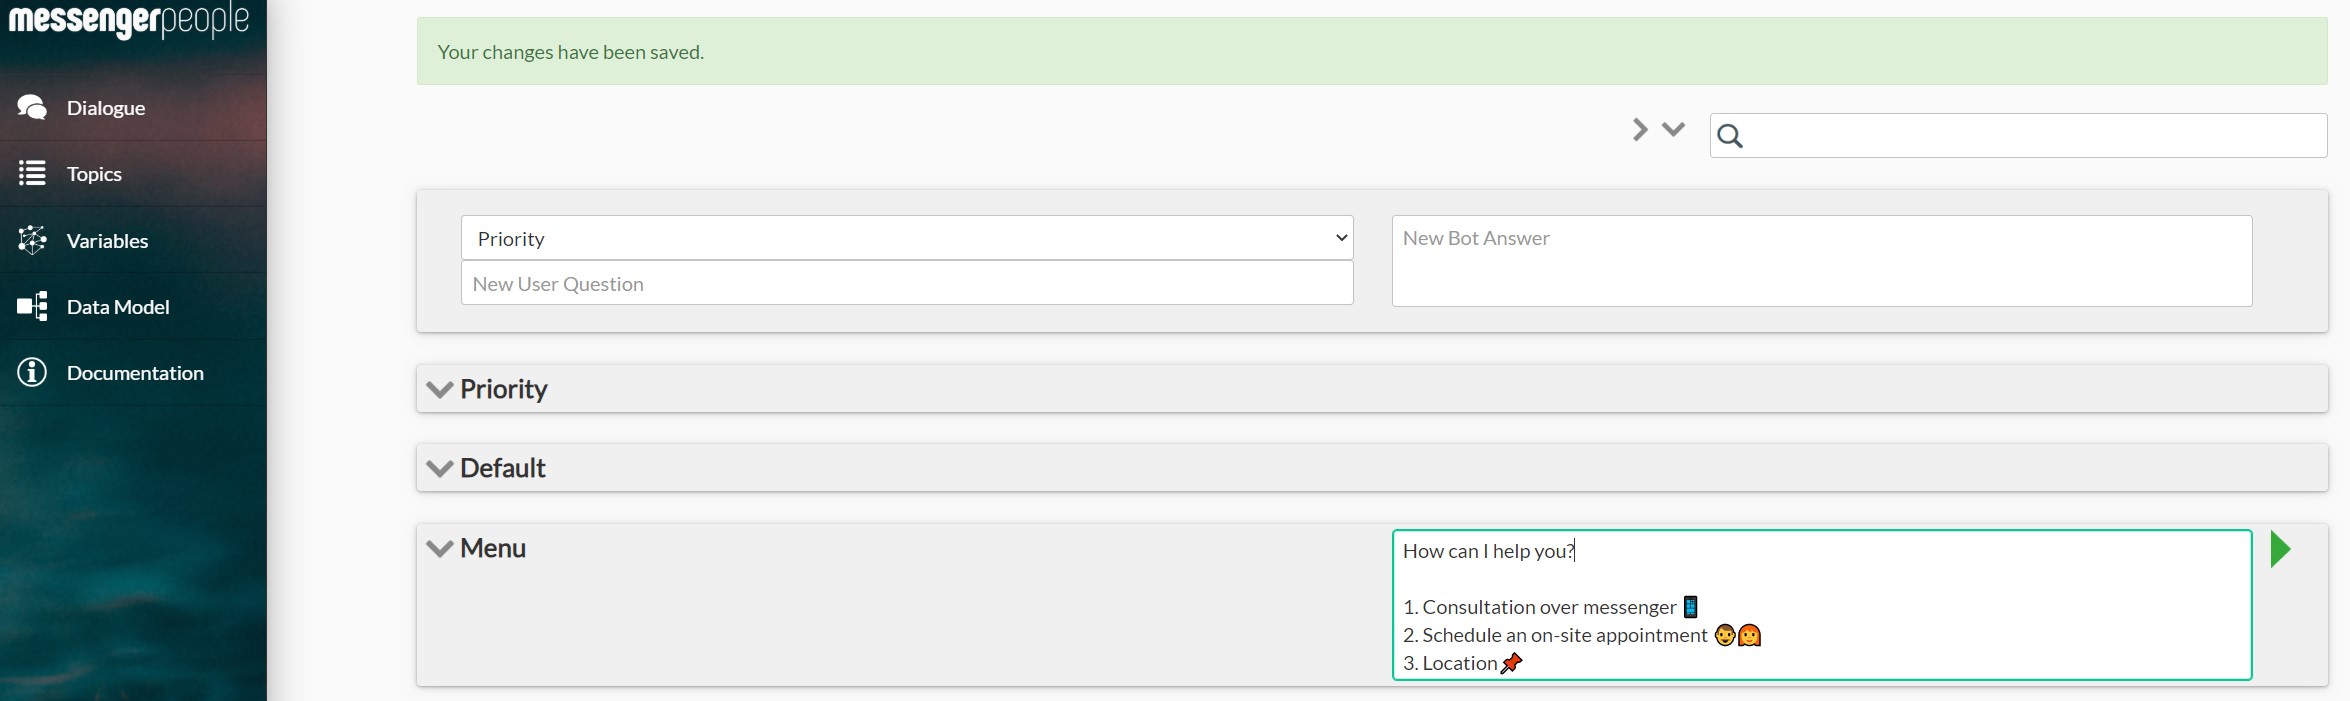
2) Switch back to the dialogue structure (tab „Dialogue“) and look for a newly created topic “Menu”. Put a list of options that a user should receive upon activating the topic “Menu” into the field “chat by activation” next to the title of the topic.
3) For each option listed in the menu, create a separate dialogue with user inputs corresponding to the options listed. Different user inputs can trigger different bot-answers but also lead to different bot-actions, for example opening a ticket for an agent or switching to a different branch of the dialogue tree. Click on the green arrow to the right of the bot-answer for a detailed view of the dialogue where you can also define bot-actions.
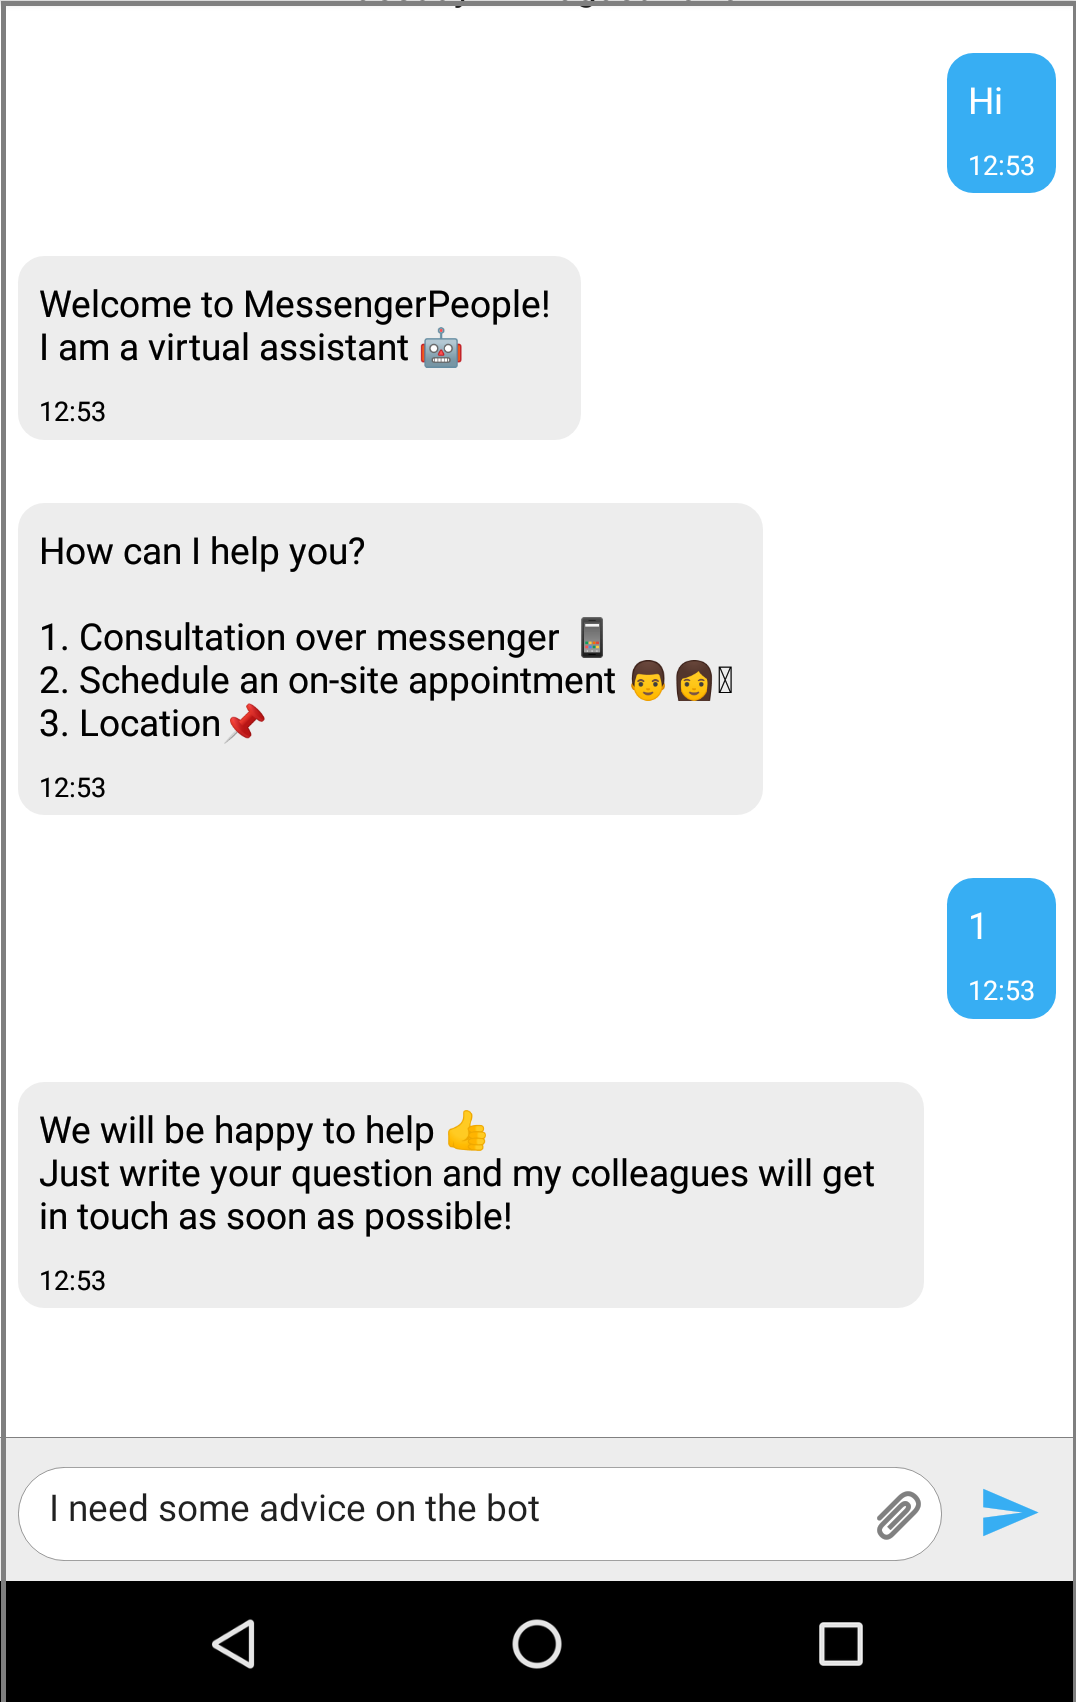
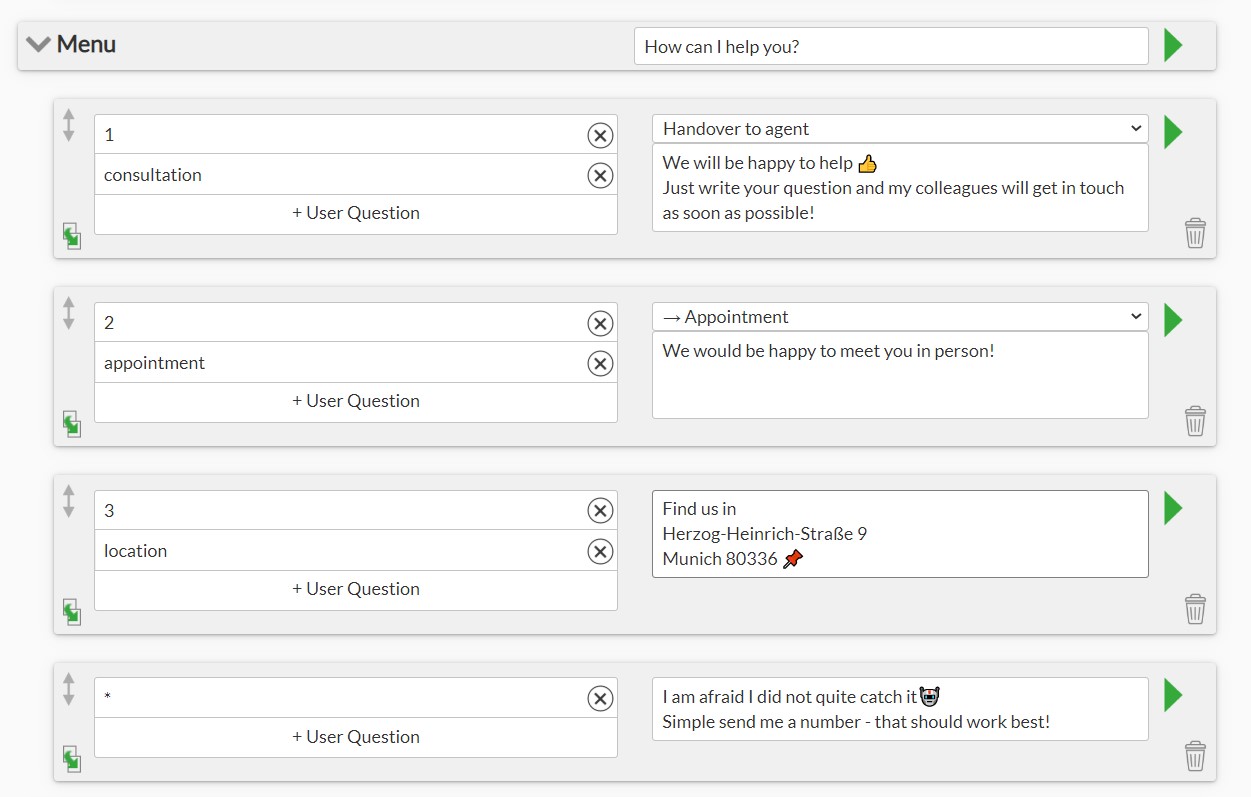
The example below shows that user input 1 or “consultation” triggers a bot response “We will be happy to help”. With the bot subsequently handing a conversation over to an agent.
User input „2“ or “appointment” triggers switching into a topic “Appointment”.
“Location” or “3” evokes a simple text response from the bot.
You should also make sure that if a user by chance sends some other text that doesn’t match with any of the options, the bot should guide the user and hint what input is expected. Use a wildcard * as user input to cover for such non-match situations and provide a user with some help.
4) With the menu being set, you now need to define how a conversation will get to the topic “menu”. Here are some ideas:
- Every new user that contacts the channel for the first time should be shown the main menu directly after receiving an initial welcome message. This is achieved by creating a dialogue with a trigger __start (double underscore) in the topic “Default” and a welcome message from the bot. Additionally define a topic change from the dialogue to the topic “Menu”.
- The start dialogue will be triggered only once – by the first registration of the user. For all already registered users set up a dialogue with a placeholder * as user input in “Default”, a text reply “welcome back” and a topic change.
- Additionally, you can set up a special command that would always activate the topic “Menu”. To do that, create a dialogue with a command e.g. “menu” and save it in the topic “priority”, keeping in mind the topic change.
- Here is how the complete structure will look like: