

Dialogues that have the same context can be grouped into topics. This critical concept is explained here.
The concept of a “topic”
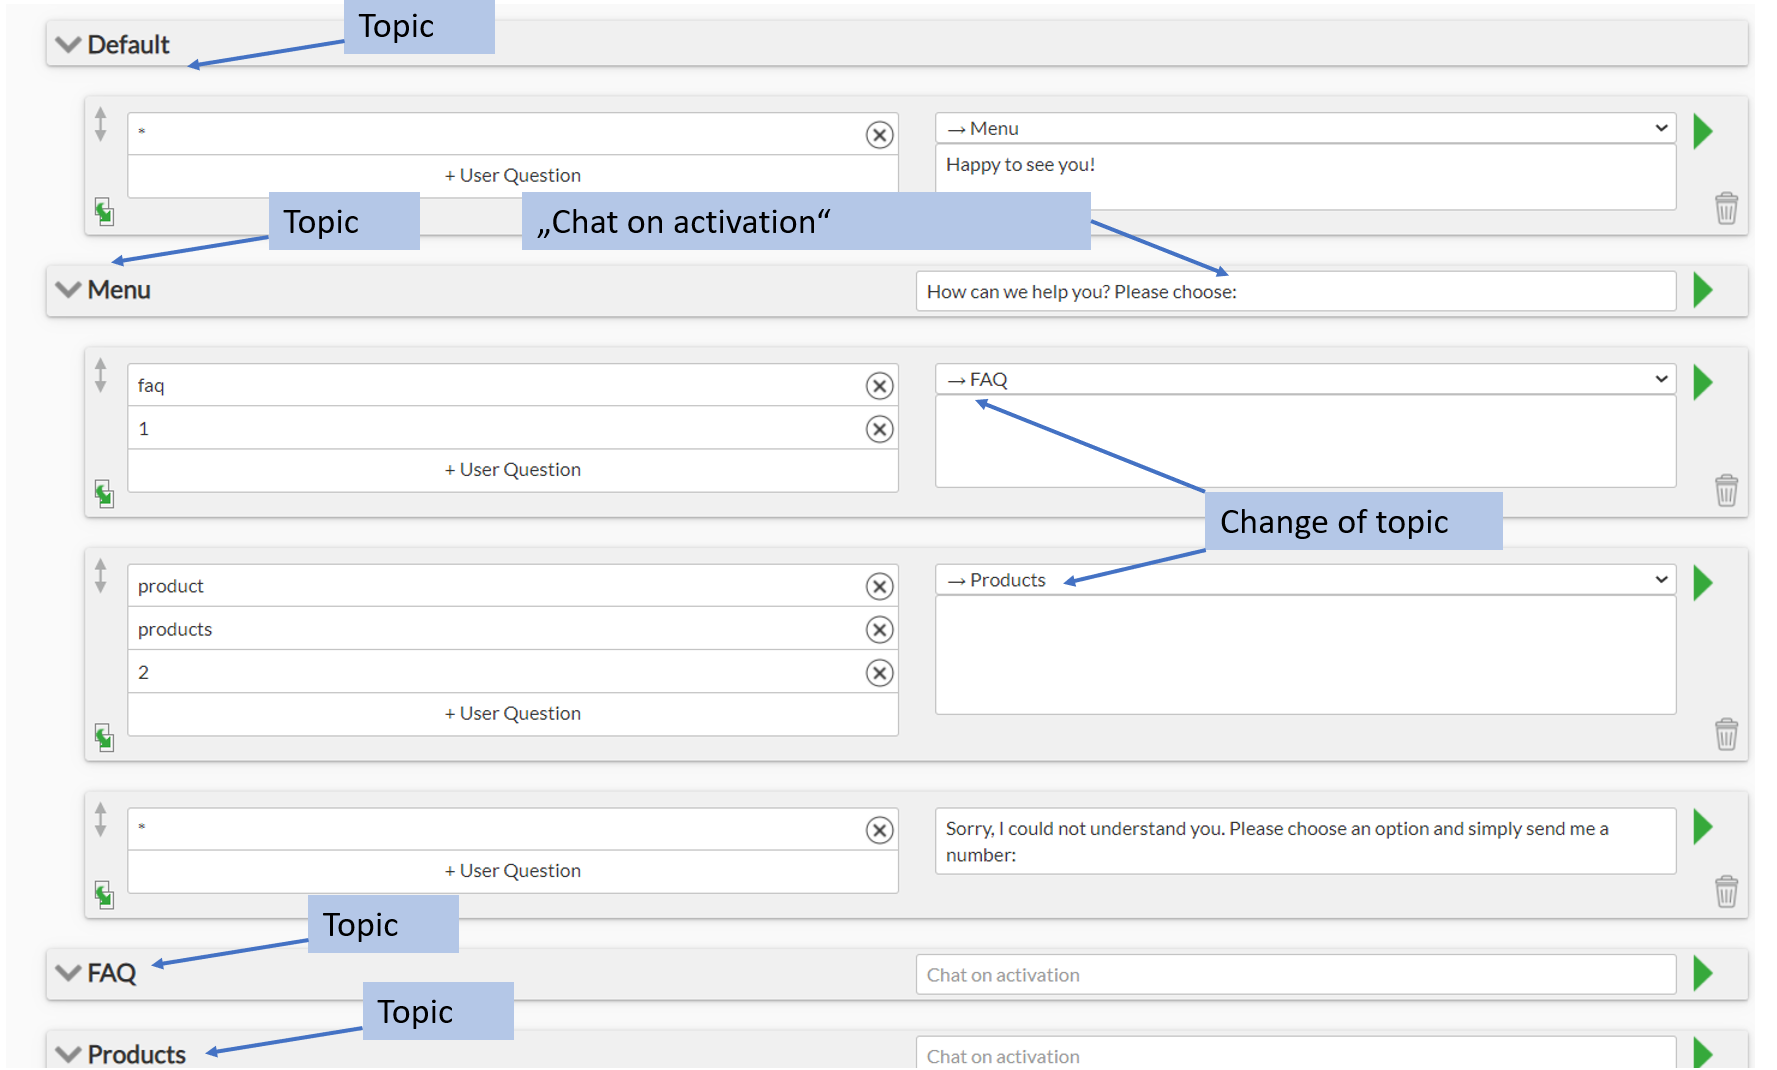
You can imagine the whole conversation flow as a tree and topics as branches consisting of a several related dialogues. A user starts a conversation from the tree stem – topic “default” – and navigates from branch to branch. In our example, after the user sends his first message, the dialogue will progress from the welcome message in the “default” to the topic “menu” containing an option menu. From there, the topic “FAQ” or “Products” will be subsequently activated depending on the user’s choice. As a rule of thumb, you would most often need a separate topic per user question (see also “Collecting user information“).

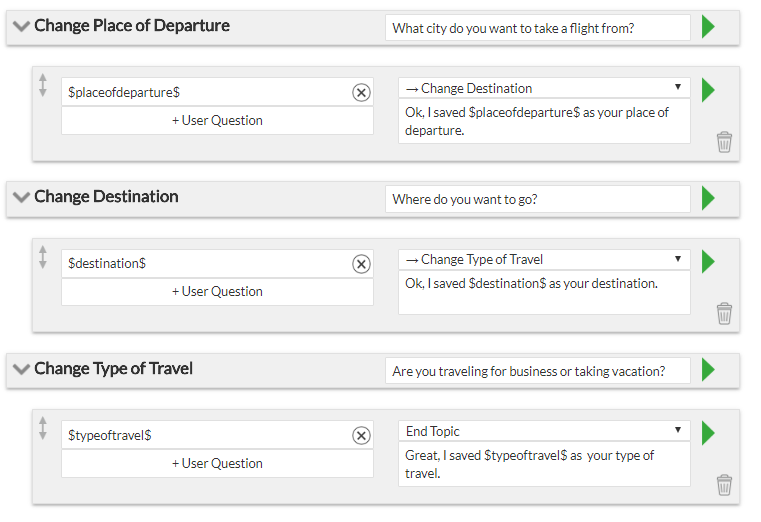
Here is another example. Here the bot asks a user a series of questions. User’s answer to a question will lead to a topic change/ new question. The rule of thumb is: one topic per question.
Setting up Topics
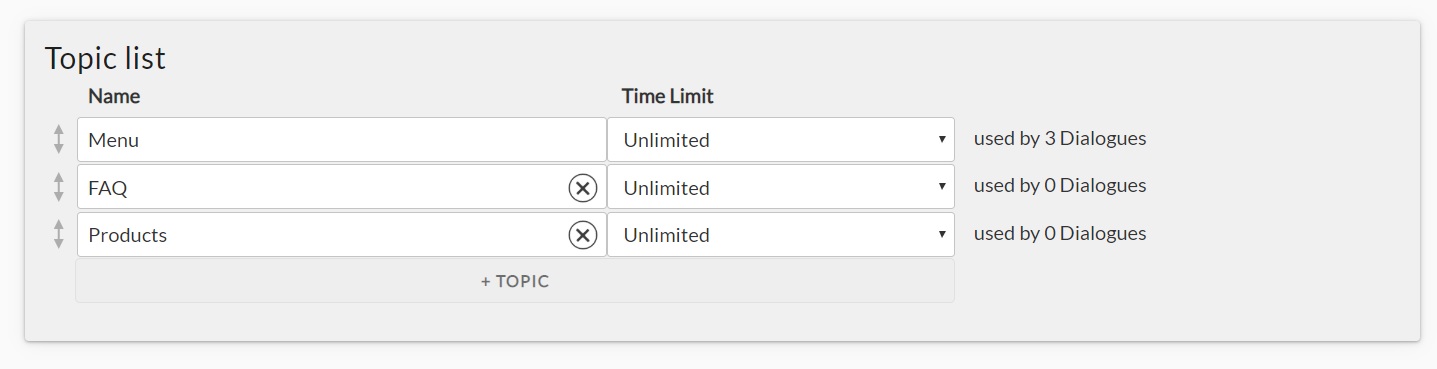
Navigate to the menu “Topics” and click on “+Topic” to add a new topic. You can create as many topics as you need. Topics “Default” and “Priority” don’t have to be set up manually: they are automatically available as soon as the first custom topic has been created. Use arrows on the left to rearrange the topics. You can also define a “life span” of your topic from the moment it is activated by setting up a time limit. After the time limit is exceeded, the topic will be automatically terminated and the dialogue status will be automatically set to the default topic.
Arranging dialogues into topics
Each time you are creating a new dialogue, it will automatically be saved under “Default”, unless you explicitly choose a topic it should be saved into. You can drag-and-drop a dialogue from one topic to another. By clicking on the grey arrow symbol next to a theme name you can expand the topic to see what dialogues it contains.

Navigating across the dialogue tree with topics
When creating a dialogue, decide whether a bot-action such as changing a topic or opening a ticket for an agent should be executed. Click on the green arrow on the right side of the dialogue box to open the detailed view and choose an action for the bot to perform (“change to”):
- Stay in the current topic (default setting)
- End topic
- Switch to topic “XY” (for example, change to “FAQ”)
- Open a ticket/Handover to an agent
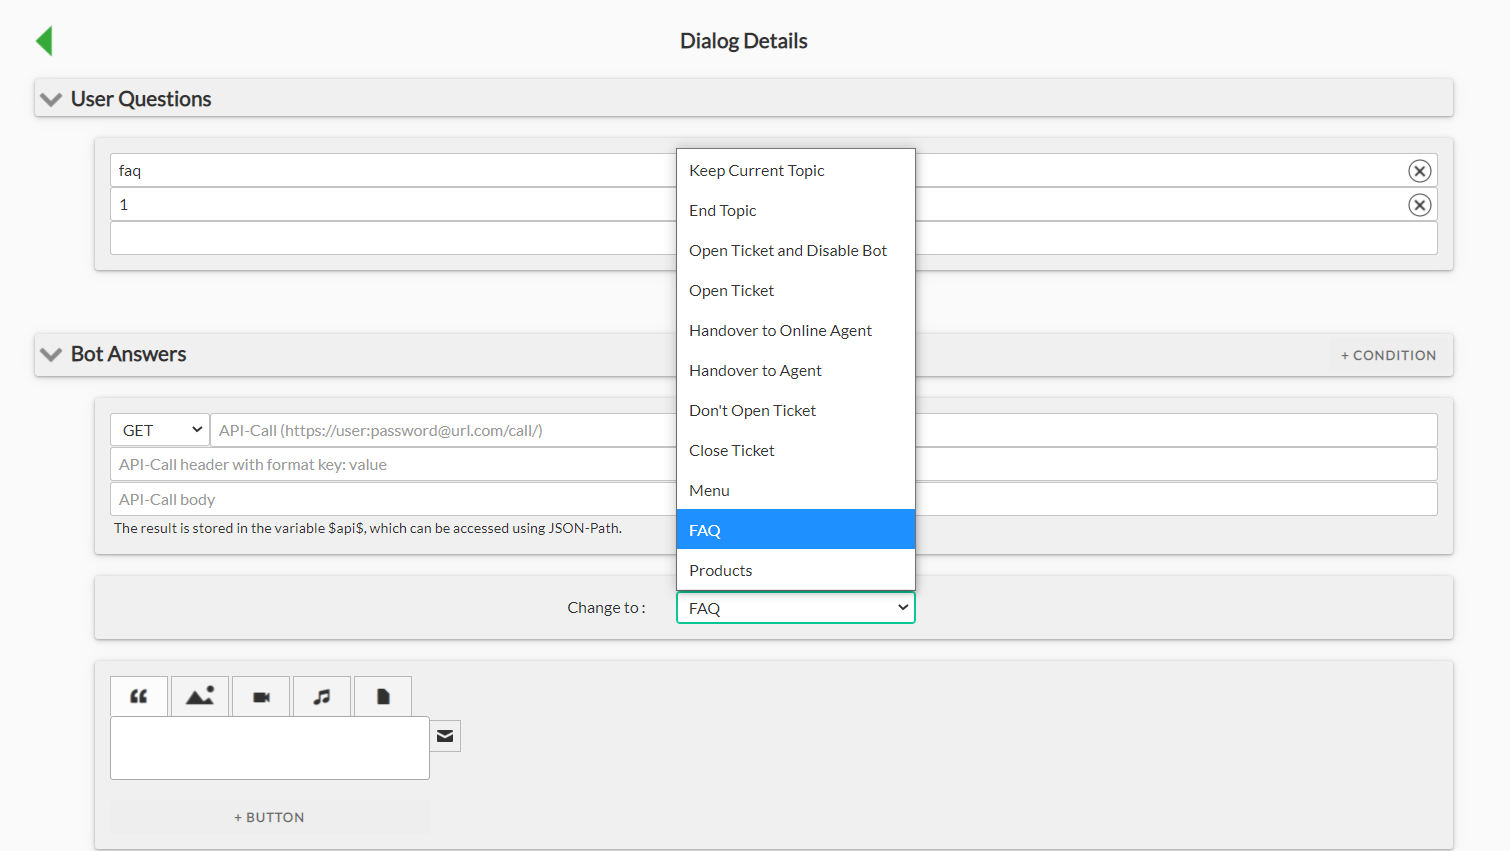
The selected action will be shown in the “change to” field upon saving the dialogue.

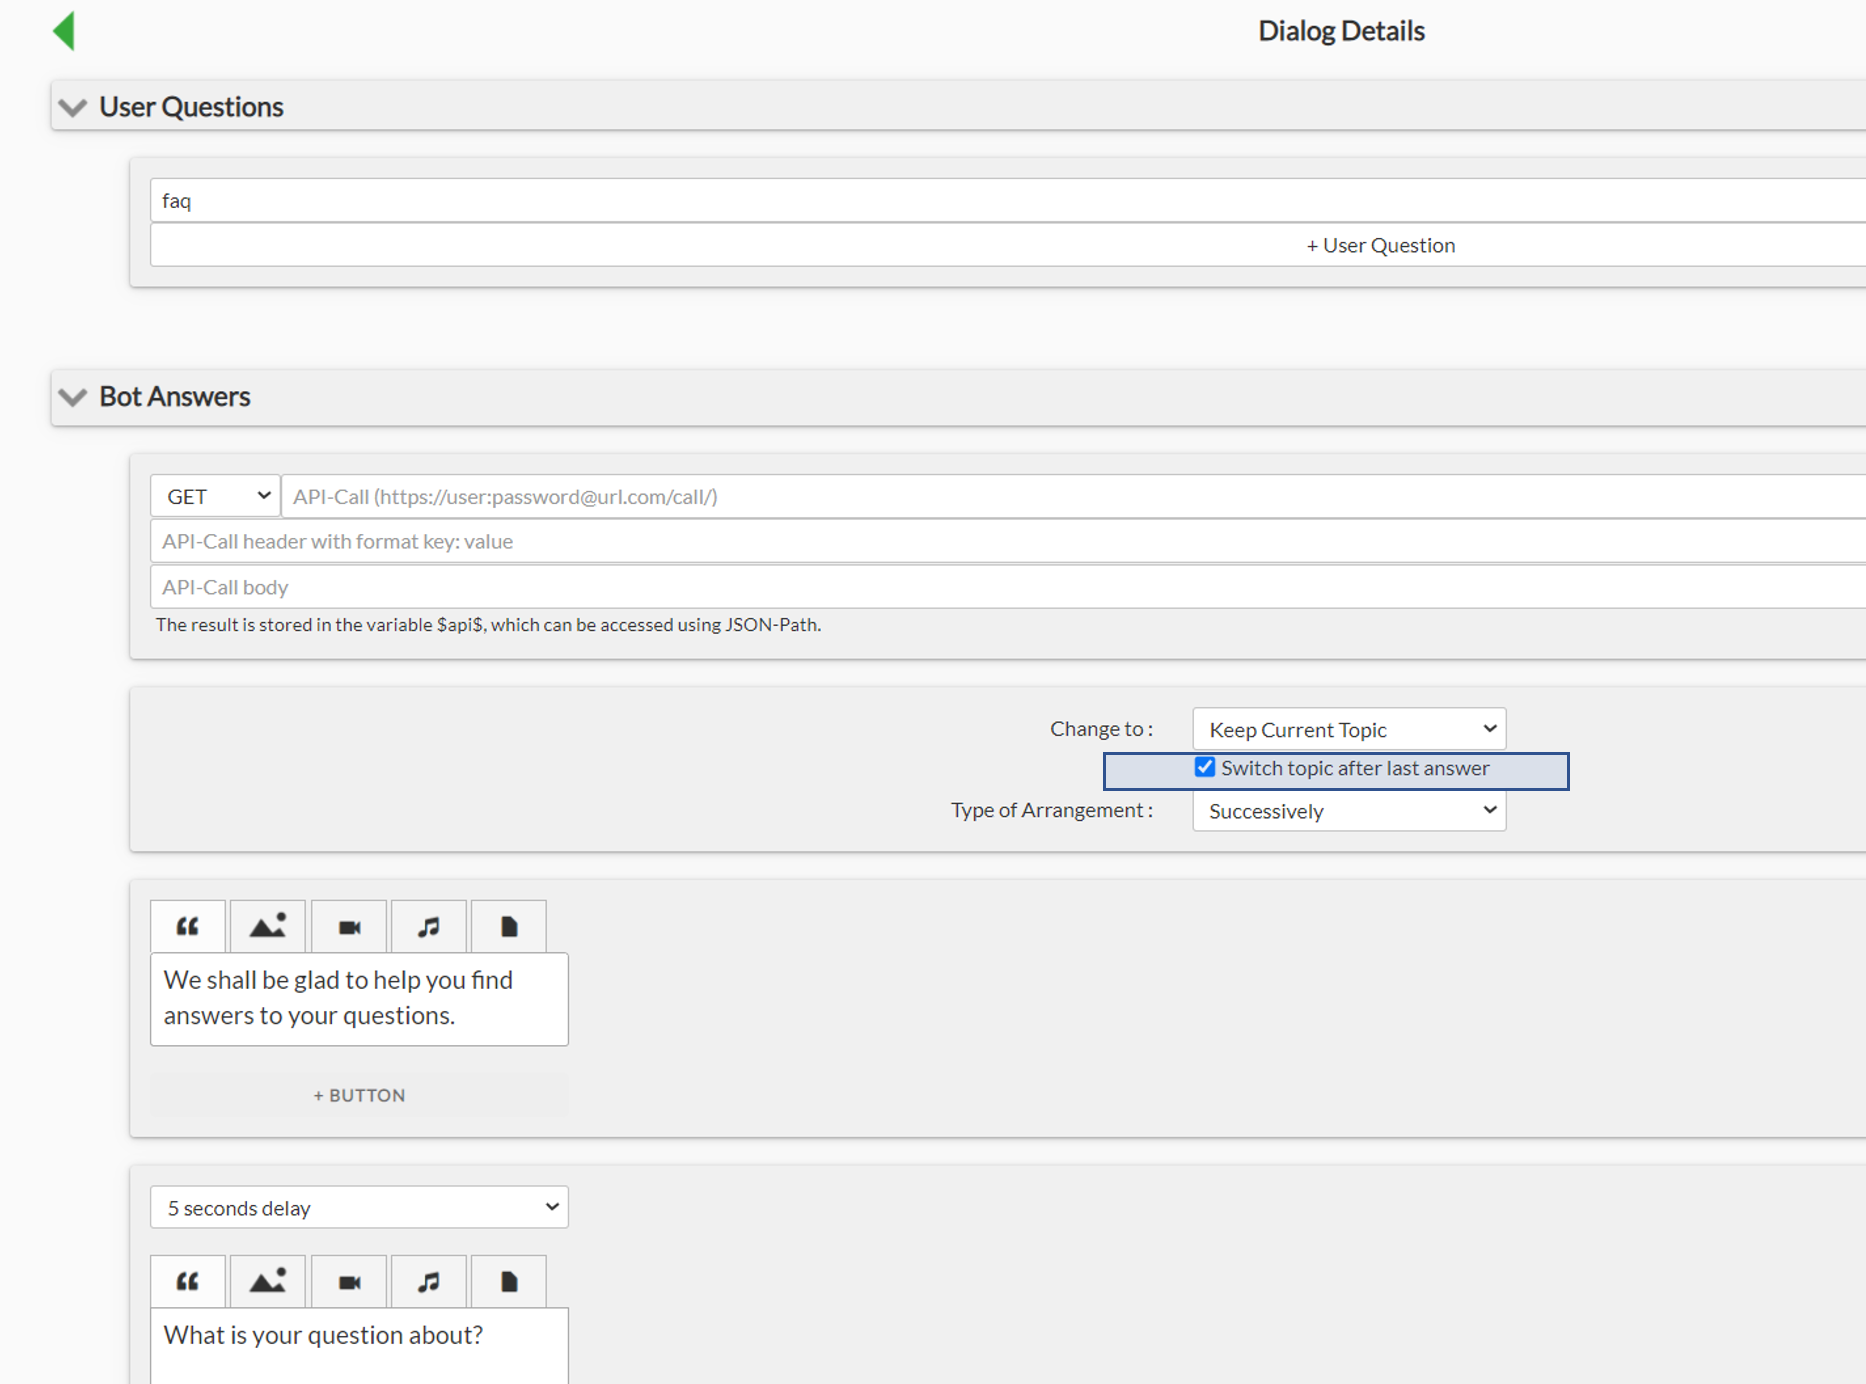
Topic change with several subsequent bot-answers
In case when the bot has to sequentially send several messages (text,media, etc.) and switch to another topic, you can define the order of actions here. By default the topic change occurs immediately, i.e. prior to sending bot-answers. You can overwrite that behavior with a setting “switch topic after last answer” (only available in cases with several bot-answers).
Chat on activation
A message defined in the field “chat on activation” next to the name of the topic will be send after a topic is activated (no user input is needed to trigger it). In our example above, the message “How can I help you?…” opens a topic by inviting a user to choose an option.

The order of matching of user queries
When the Chatbot received a user query, it tries to match the query to keywords defined in the chatbot-builder whilst going top to bottom through all the dialogues in a this specific order:
- First, in the topic “Priority”
- If not, In the currently active topic
- In not, in the topic “Default”
Depending on where the bot finds the keyword, the corresponding answer will be used. The rest of the dialogues won’t be played.
If the chatbot doesn’t recognize any keywords in the user query, then it doesn’t respond and opens a ticket. You can avoid this by creating a dialogue with the placeholder function (*) as a user input.