

Processing repeated requests can be very time consuming for your customer service team. In this tutorial we show you how a chatbot can assist by handling initial user data collection and then handing over to a human support.
A small bot will do the following things: welcome a user, ask him for his/her name, why is he/she contacting the support channel and whether he/she is a customer. If he is a customer, the bot will prompt a user to enter his customer number and hand-over to a customer support agent. If a user is not a customer, the bot will directly hand over to sales-support team.
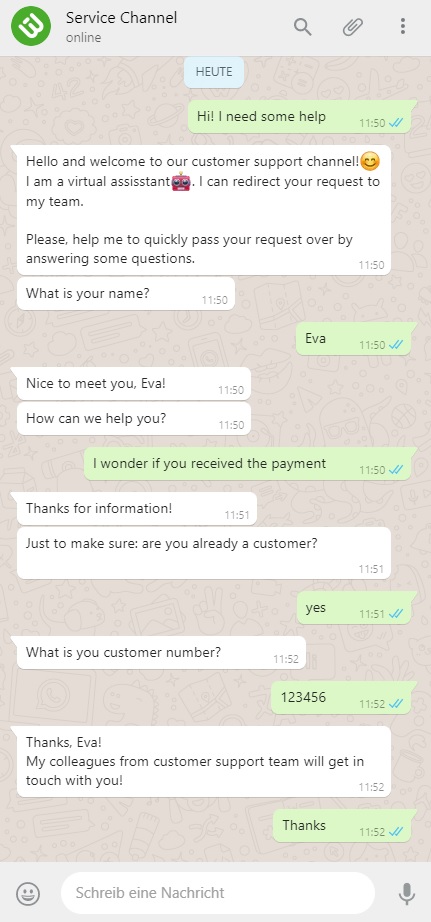
Here is a flow chart of a conversation to be created:

1. Start by creating a welcome dialogue
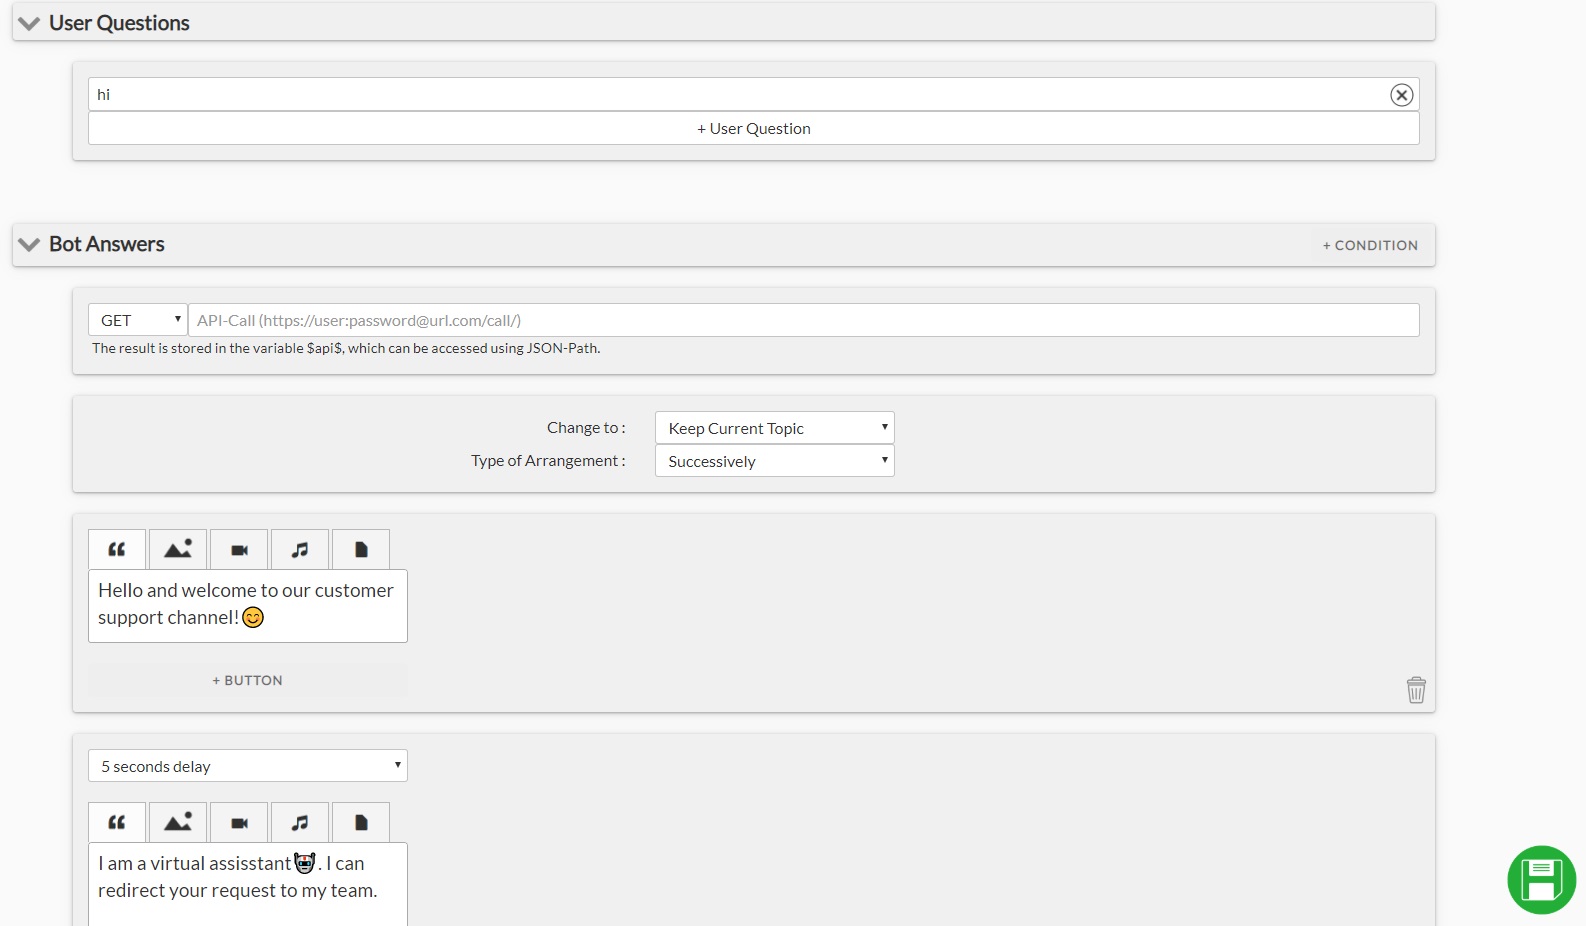
When you open your chatbot-builder for the first time, all your “dialogue”-workspace is going to contain is a single rectangular box called „dialogue “. In the left column you can define user keywords that will trigger a bot answer defined on right side.

What this does is telling the bot that whenever user input contains a word “hi” (it can be both a long sentence starting with a “hi” or simply “hi” on its own), the bot will respond “Welcome…” Clicking on the green arrow on the right side of the box to get an extended view of this dialogue and customize it further on, for instance by adding media or the subsequent message to it. We shall add the second message that will come with a delay of 5 seconds after the welcome message as follows:
2. Ask user for his/her name
… and save it to personalize the conversation.
For that, switch to the menu option “variables” on the navigation panel and create a variable (i.e. a container) that should store user’s name. Whatever a user inputs will be some text (a name can be a multiword expression), so let’s define the type of data that a variable can contain as “text”. Variables contain customer properties that are visible to your customer support team when they are responding to the tickets.

Navigate to the menu “topics” and set up a new dialogue topic – titled “Ask for name”. That would create a new contextual node in the dialogue tree. All dialogues regarding customer’s name will be placed within this topic.
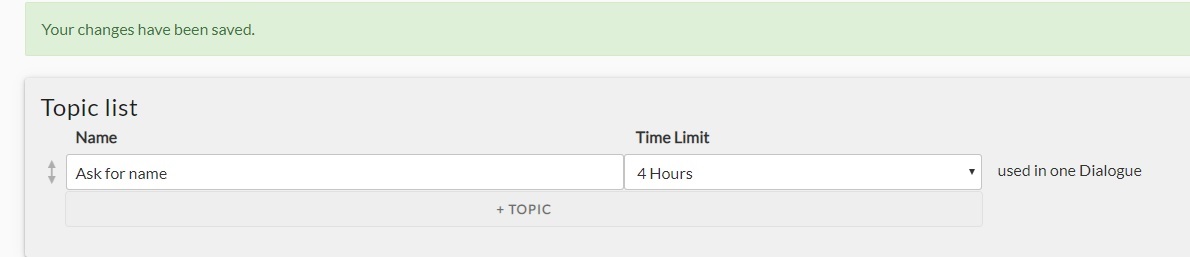
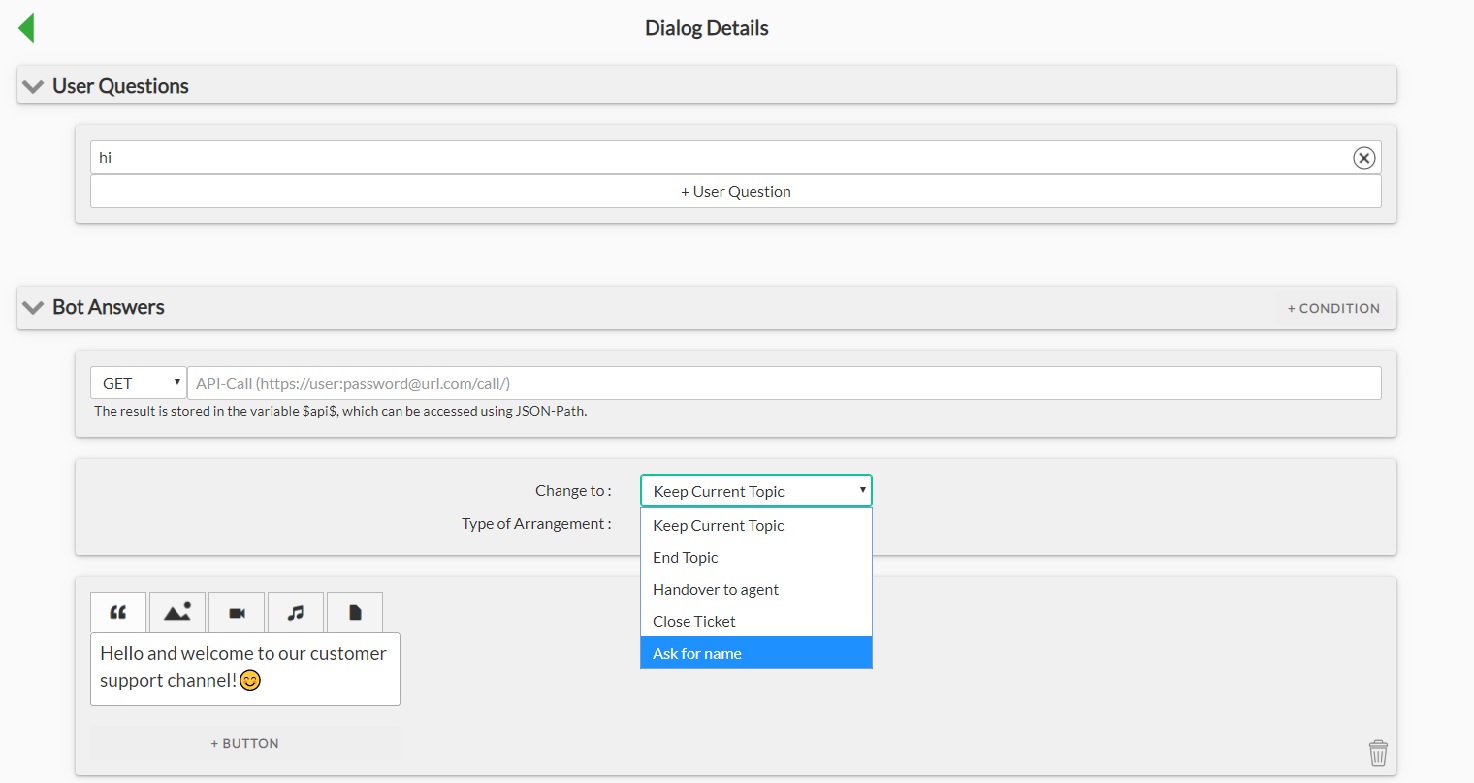
Going back to the dialogue-workspace notice a change: there appeared a topic “Ask for name”. Now direct the bot from the welcome dialogue to the topic “ask for name”. To do this define the bot action to be performed along with the greeting message as Change topic:
Now have a look at the newly created topic. In the field “chat by activation” we can enter a text that will open the topic. In our case, once a topic got activated, we want our bot to ask for the user’s name.
We also need a new dialogue in this topic where the user will be able to write his/her name and this name will be saved into a variable $name$ (notice, that you need to put variable names in dollar signs to refer them from the chatbot). Here is how you can do that:
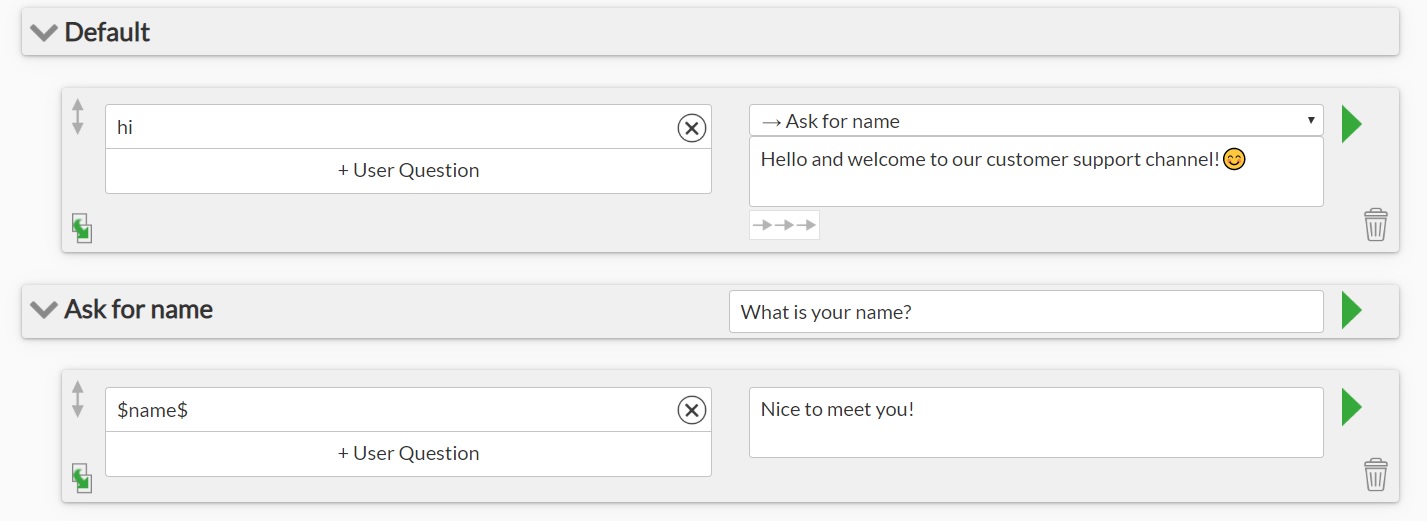
Now the bot knows user’s name and can immediately make use of it in the conversation.
3. Ask what the user is contacting your service channel about
This is done just the same way as asking for user’s name: create a variable, e.g. $user_question$, a new topic “User’s question”, define change of topic from the theme “Ask for name” to “User’s question” and create a new dialogue in which the user can share his concern:
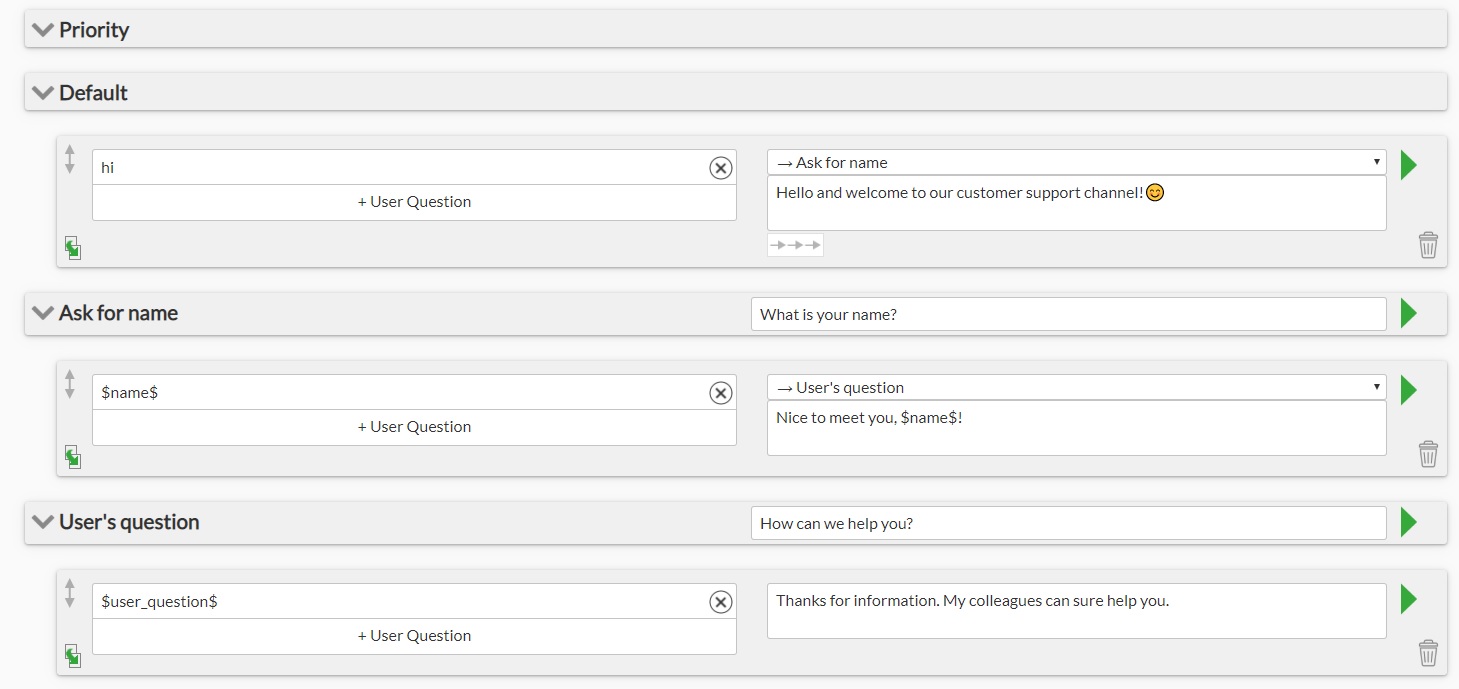
For more information on collecting user data with a chatbot, have a look hier.
4. Ask if the user is a customer
Now the bot will want to get information whether the user is already a customer or not and depending on that open a ticket for pre-sales team or ask for customer’s number and hand over to a customer support team.
To do that:
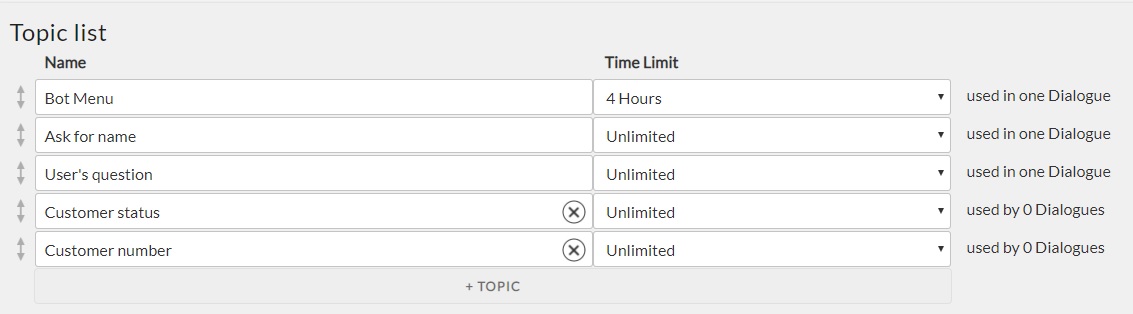
- Create two topics: a new topic “Customer status” opening it with a question: “are you already a customer?” and “Customer number” opening with a question “please, give me your customer number”
- Create two variables $customer_status$ and $customer_number$. The variable $customer_status$ should be able to store only an answer to a question “are you a customer?”, which can be either “yes” or “no”. Set the type of variable to “enumeration” and allow its values to be only “yes” or “no”. $customer_number$ will be numeric.

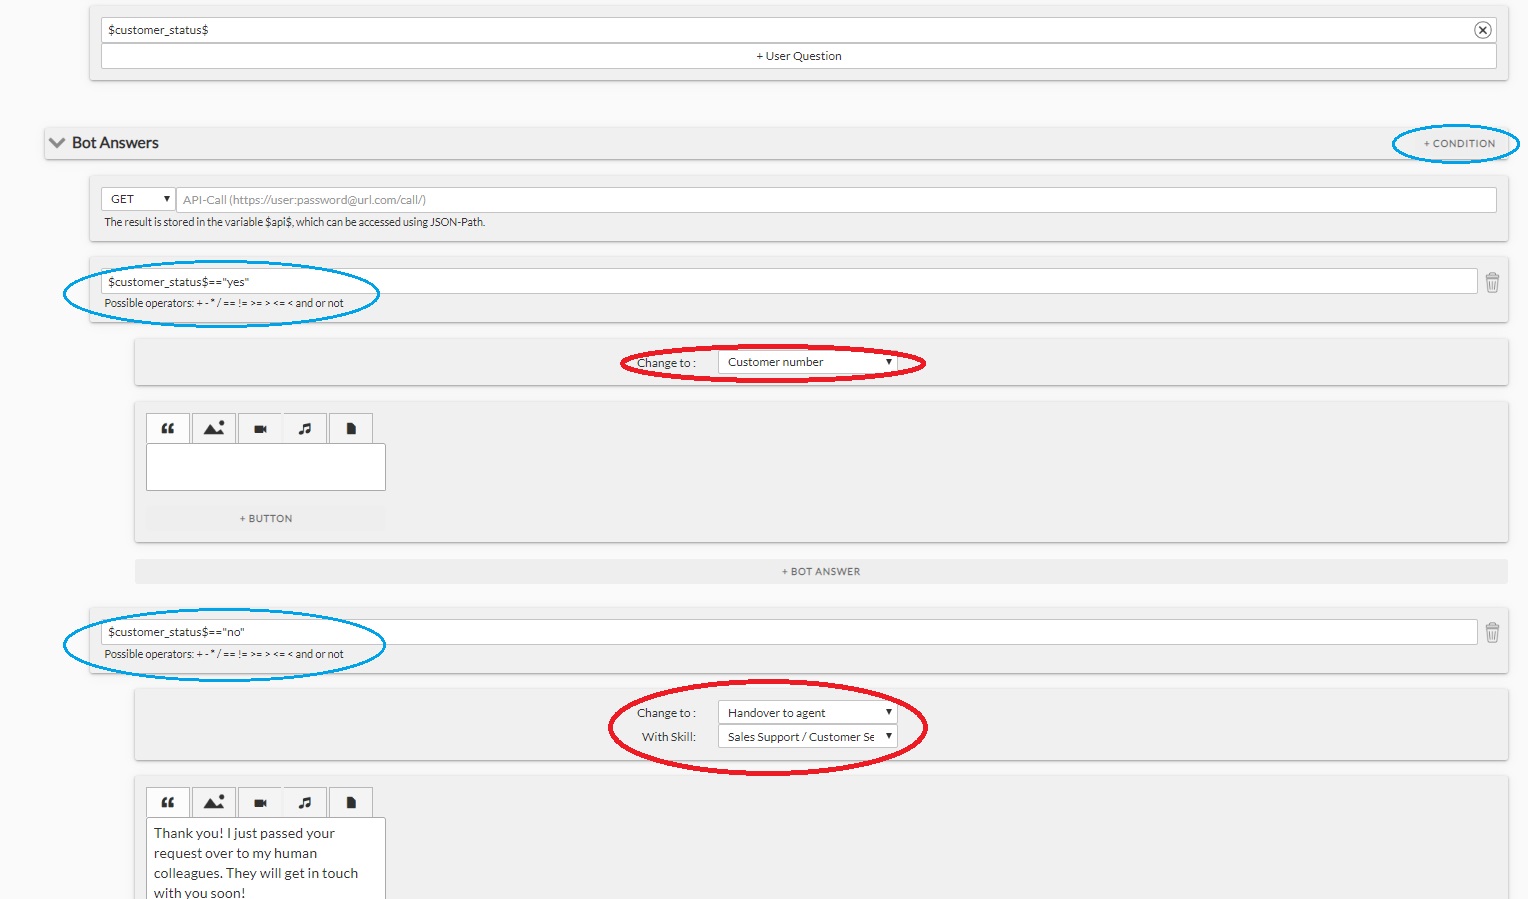
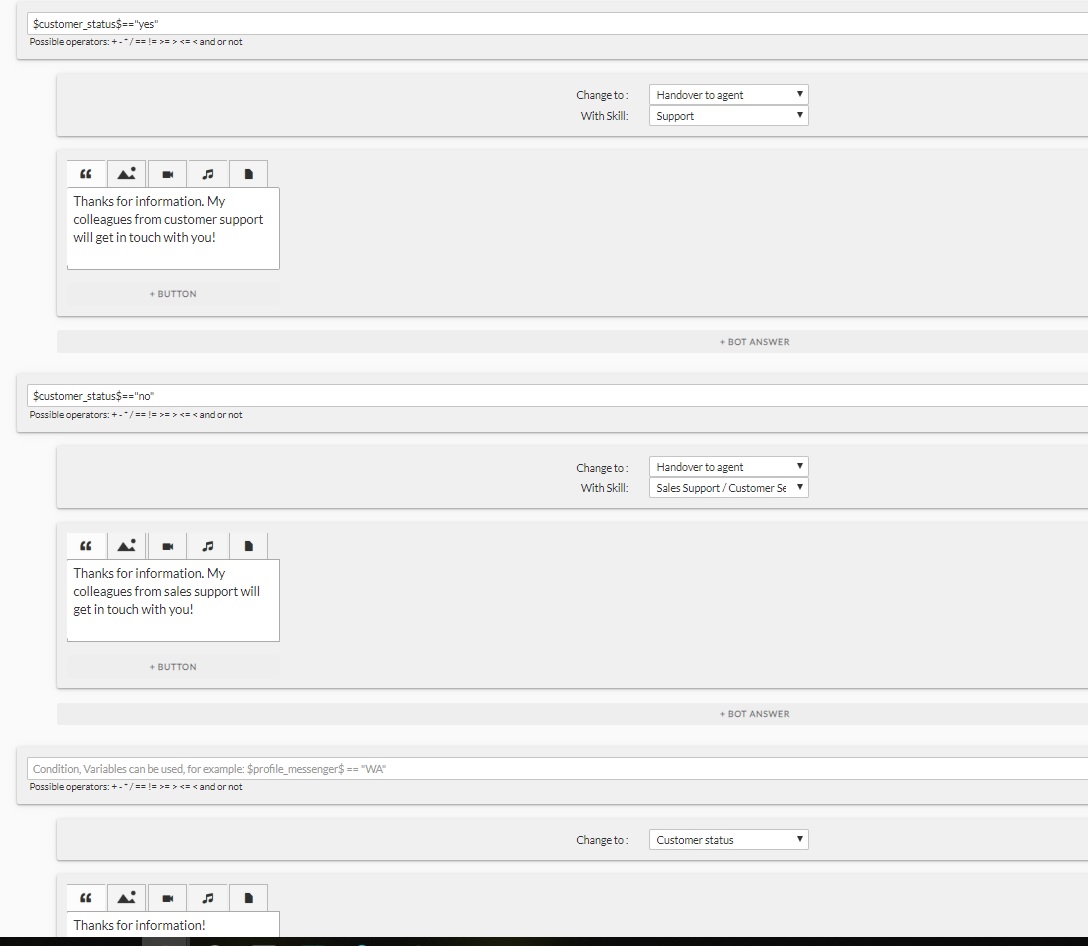
Create a new dialogue in the topic “Customer status” and condition bot-answers. If a user says yes, the bot should ask for customer’s number, otherwise it can hand over directly a ticket to pre-sales team. This is done by adding conditions to your bot which compare the value of the variable $customer_status$ to strings “yes” and “no” and if a condition is fulfilled, the respective bot-answer will be returned:
- If a user is not yet a customer, the bot will directly open a ticket for an agent with a skill “sales support” (different skills can be defined in advance in channel settings).
- If a user is a customer, the bot will jump to a topic “Customer number”.
The variable $customer_status$ is allowed to store only the values “yes” or “no”, therefore you need your bot to be able to respond in case a user writes something else. Using a wildcard * as user input, you can create a fallback bot response to any other text that a user writes prompting a user that a “yes” or “no” is expected at this point.

Set up the topic «Customer number“ in a similar fashion: it should include two dialogues, one covering the case when a a user writes his/her customer number and the bot hands over to an agent with a skill „customer support“ and another a dialogue with a wildcard for the bot to respond to everthing else. What your bot will respond to an unrecognized user input is up to you: maybe it will prompts a user to enter his customer number again, or (not to be too annoying) directly hand over to an agent who should then in a live conversation try to find out a customer number.

5. Final improvements
First, go back to the „welcome“ dialogue and improve it a bit:
- First, change „hi“ to a wildcard. You never know what a user is going to write to start a conversation in the channel. But whenever he/she does write something, the bot will great and start the dialogue flow.
- Create two conditions in the dialogue: if user’s customer name is already known (conditions reads: if $name$ is not empty), the bot should great a user by name and ask a user what his problem is; otherwise, ask for a name.
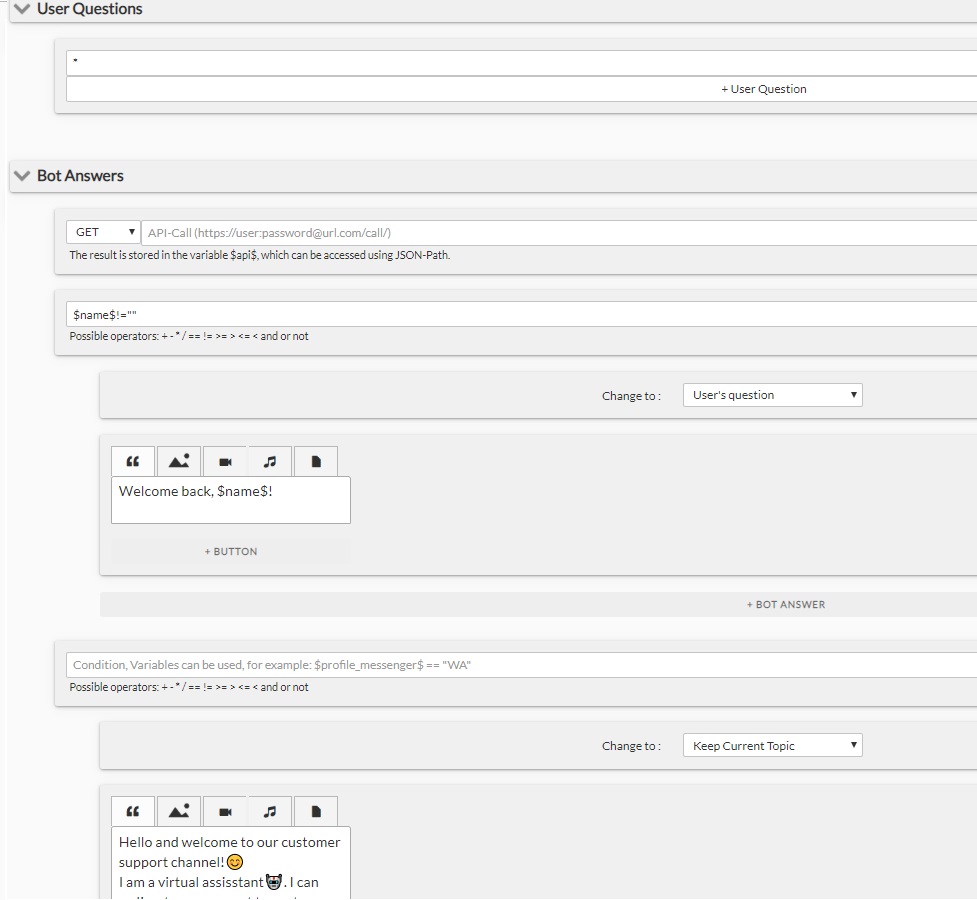
As a last step, improve the dialogue $user_question$ by creating conditions:
- If users customer status is „yes“ – direct to customer support
- If user customer status – „no“ – direct to sales support
- If everything else: ask for the customer status…
And here is the complete structure you get:
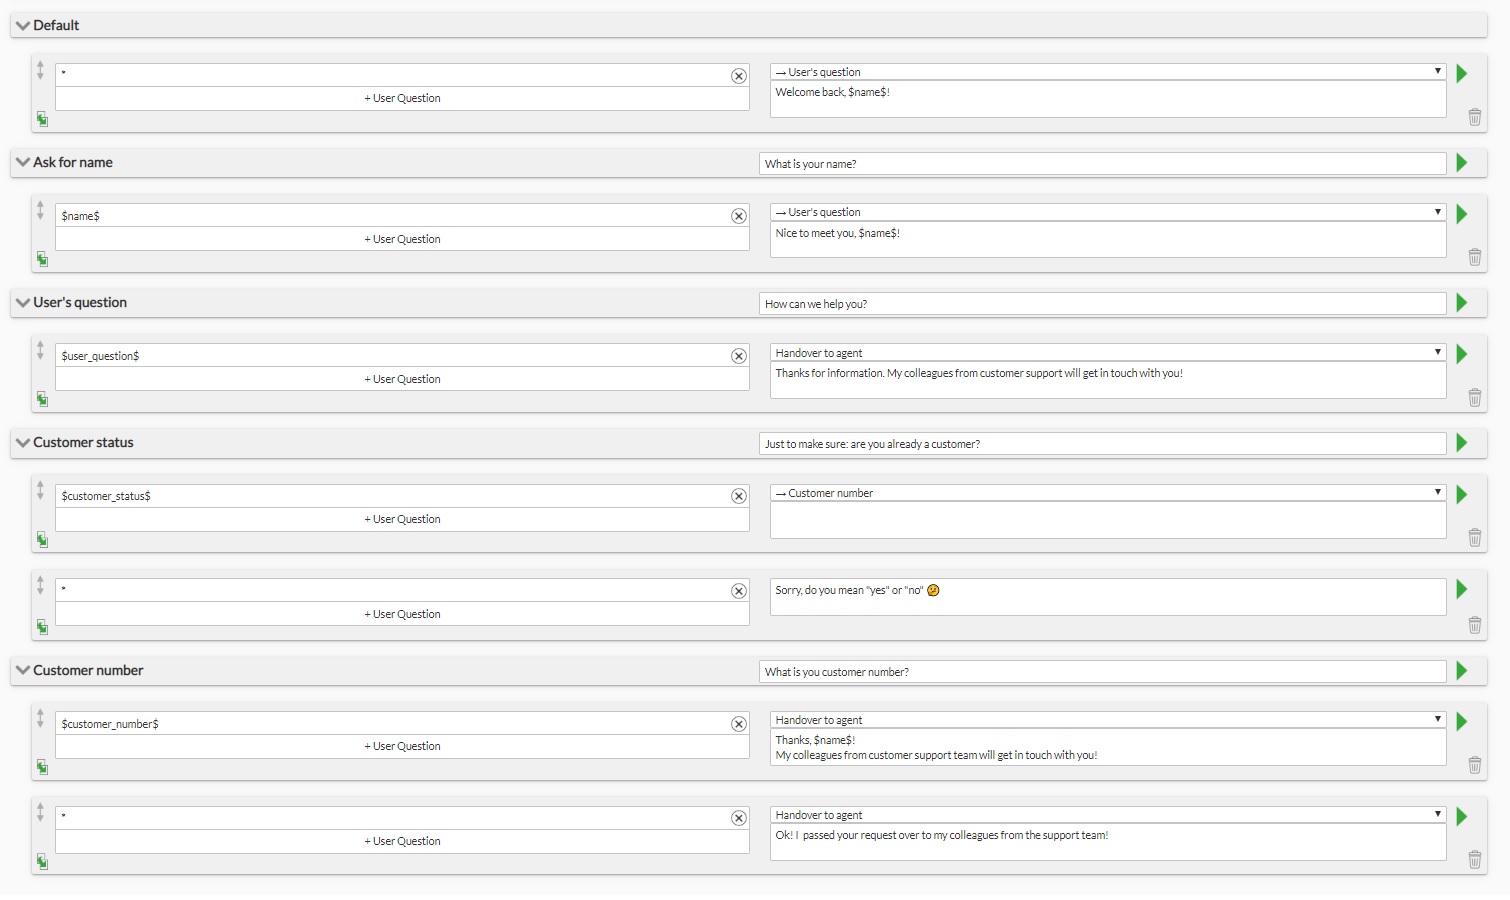
You are now set! Try it out 😊
PS: This is a minimal version of a chatbot that can of course be expanded. For instance, you may want to create a database (referred to as „datamodels“ in our system) containing all records of your registered customers and sinchronize it with your CRM via API. You can check whether a customer number a user enters indeed exists in the database. Or even more that, you could ask for the customer number as a first step and if a customer is found get his/her first name from the database, skipping an unnecessary step of asking a user for his name. Countless possibilities are possible here. Have fun exploring and creating!