If a user signs up for your channel via a widget, he can accept data protection policy by setting checkmark in the widget. In case a user writes directly to the channel, a bot can do the job of asking for user consent. Here is how you can set up a bot to do that. Alternatively, we can activate the described bot in your channel, feel free to contact our support team at [email protected]
Use case
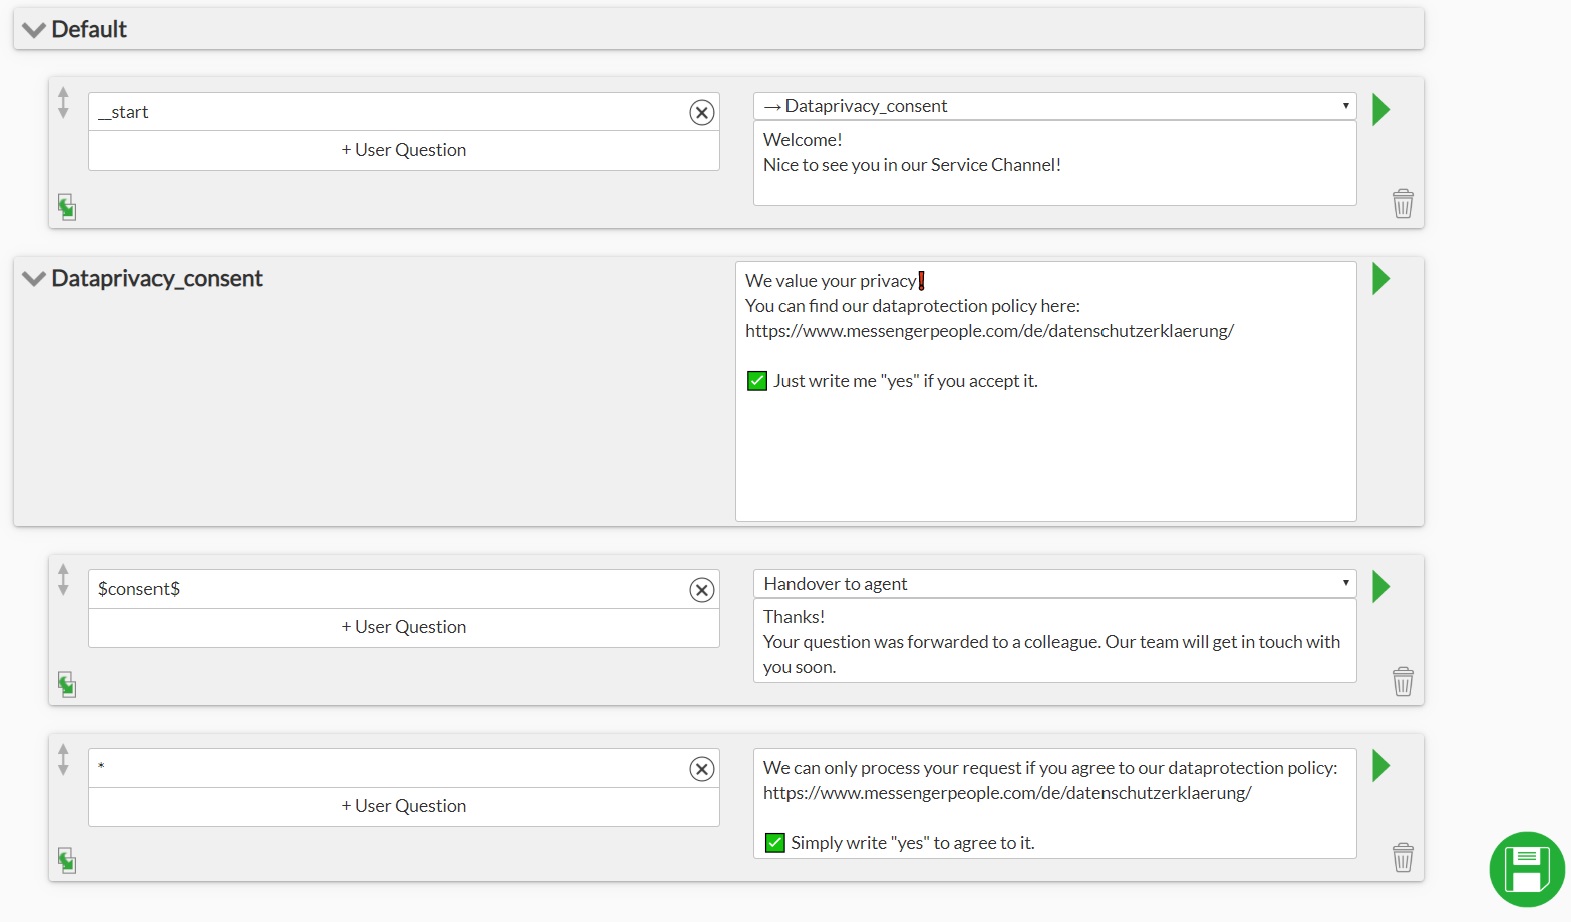
When a user registers for the channel, a bot will ask a user to agree to privacy policy. If the user gives his consent, the bot will save the response and hand over to an agent. Should he contact the channel again, the bot will greet a user and directly open a ticket for an agent. If a user rejects data-privacy policy, a warning will be sent.
Your steps:
1. Deactivate a welcome message in Settings/Channel/Settings.
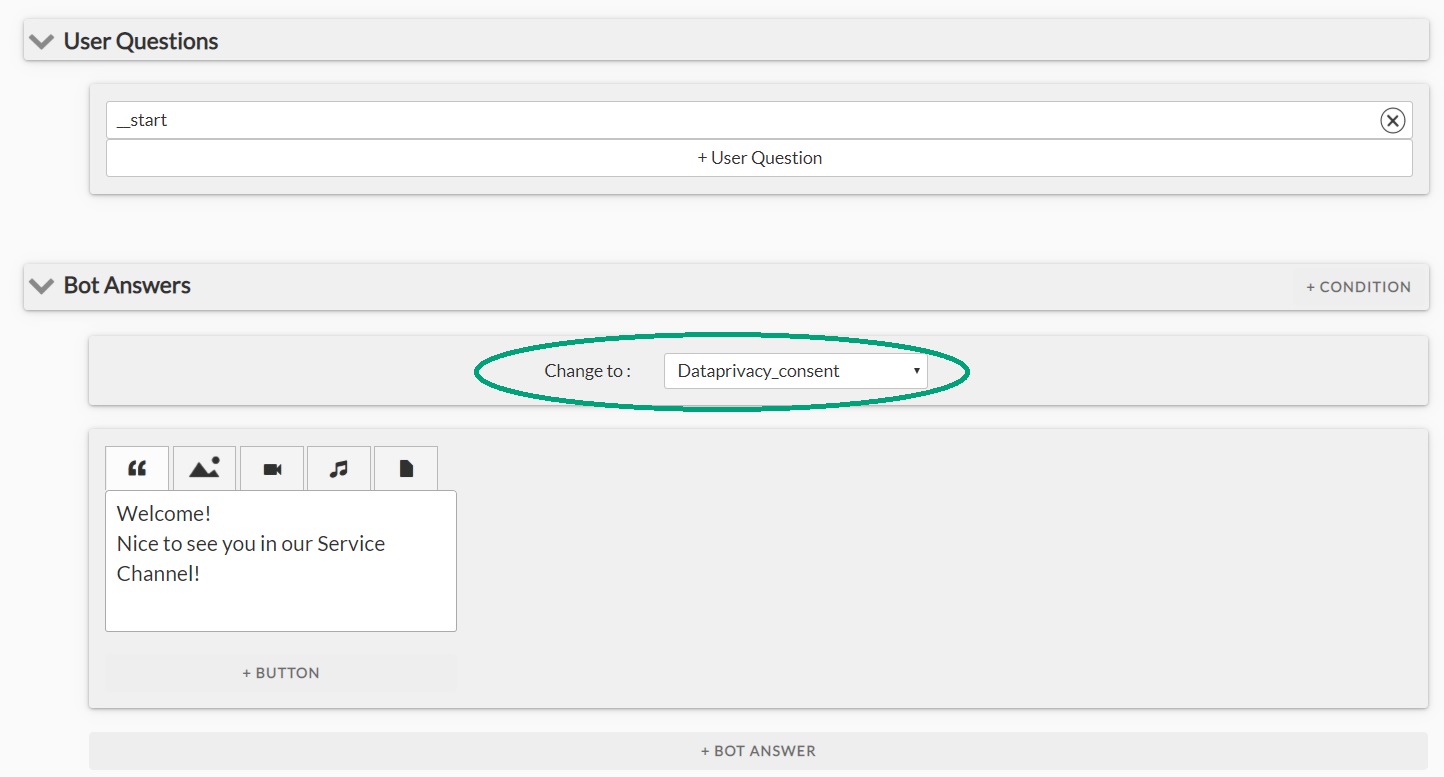
2. Navigate to your Chatbot.builder (Settings/Channel/Chatbot-Builder) and create a welcome dialogue with a special command __start as user input and a welcome message from a bot to greet the user.
3. Consent provided by a user can be stored in a variable. Switch to the menu point “variables” and create a variable with a desired name, e.g. “consent”. We only want to save a response if a user explicitly answers with “yes” to a question on data privacy, so set the datatype to “enumeration” and list “yes” as an allowed value.
4. Proceed to the menu point “topics” and create a topic “Dataprivacy_consent” without time limit. Once this topic gets activated during the dialogue flow, all user answers will be interpreted by a bot as somehow related to the question of data protection.
5. Go back to the dialogue structure and:
- define a change of topic from the welcome message to the topic “Dataprivacy_consent”. Click on the green arrow on the right for an expanded view of the dialogue.
- In the field “chat by activation” of the topic “Dataprivacy_consent” enter the bot message asking the user to provide his consent with your data protection policy.
- If a user answers “yes”, save the answer into a variable “consent” and assign a ticket to an agent.
- If a customer writes something else but “yes”, create a warning similar to the following one in the example.
That done, you little bot is ready!


